Revised 07/11/2016
Physics 2306 Laboratory Equipment List
Lab 4: Electrostatics
Transition Notes:
- The following can stay from the previous lab (2306 lab 3):
- 850 Interface
- USB - mini USB Cord
- Sweepy!
Equipment List:
- 850 Interface
- USB - mini USB Cord
- 8 pin DIN to Mini - DIN cord
- Aluminum Pan
- Electrostatics Cable Bag
- BNC to Alligator Cord Electrostatics type
- Banana Plug Cord - Black
- Banana to Spade Cord - Black
- Banana to Spade Cord - Red
- 2 x Lid as Electrophorus (Tray Lid)
- Electrometer
- 4 x AA Batteries
- Electroscope
- Small Electroscope Plate
- Electroscope Ball with Plug
- Faraday Ice Pail
- Electrostatic Power Supply
- Electrostatic Power Supply AC Adapter (Please note that there are two types and they are all compatible with one another.)
- Large Wand Plate (attached)
- Small Wand Plate (loose)
- Charge Wand Screw
- Electroscope Condenser Wand
- PASCO Proof Plane
- 1 pair Insulating Gloves
- 3 x Aluminum Ball Bearings in Bags
- Bearing Tweezers
- 2 x Lid Electrophorus
- Microfiber Cloth
General Class Use :
- Place a stack of Microfiber Cloths at each TA table.
- Make sure there is a Laundry Bag for each quad.
- Ethanol
- Box of Kim Wipes
The proof plane and screens should be on the table. There are no pegboards for this class.
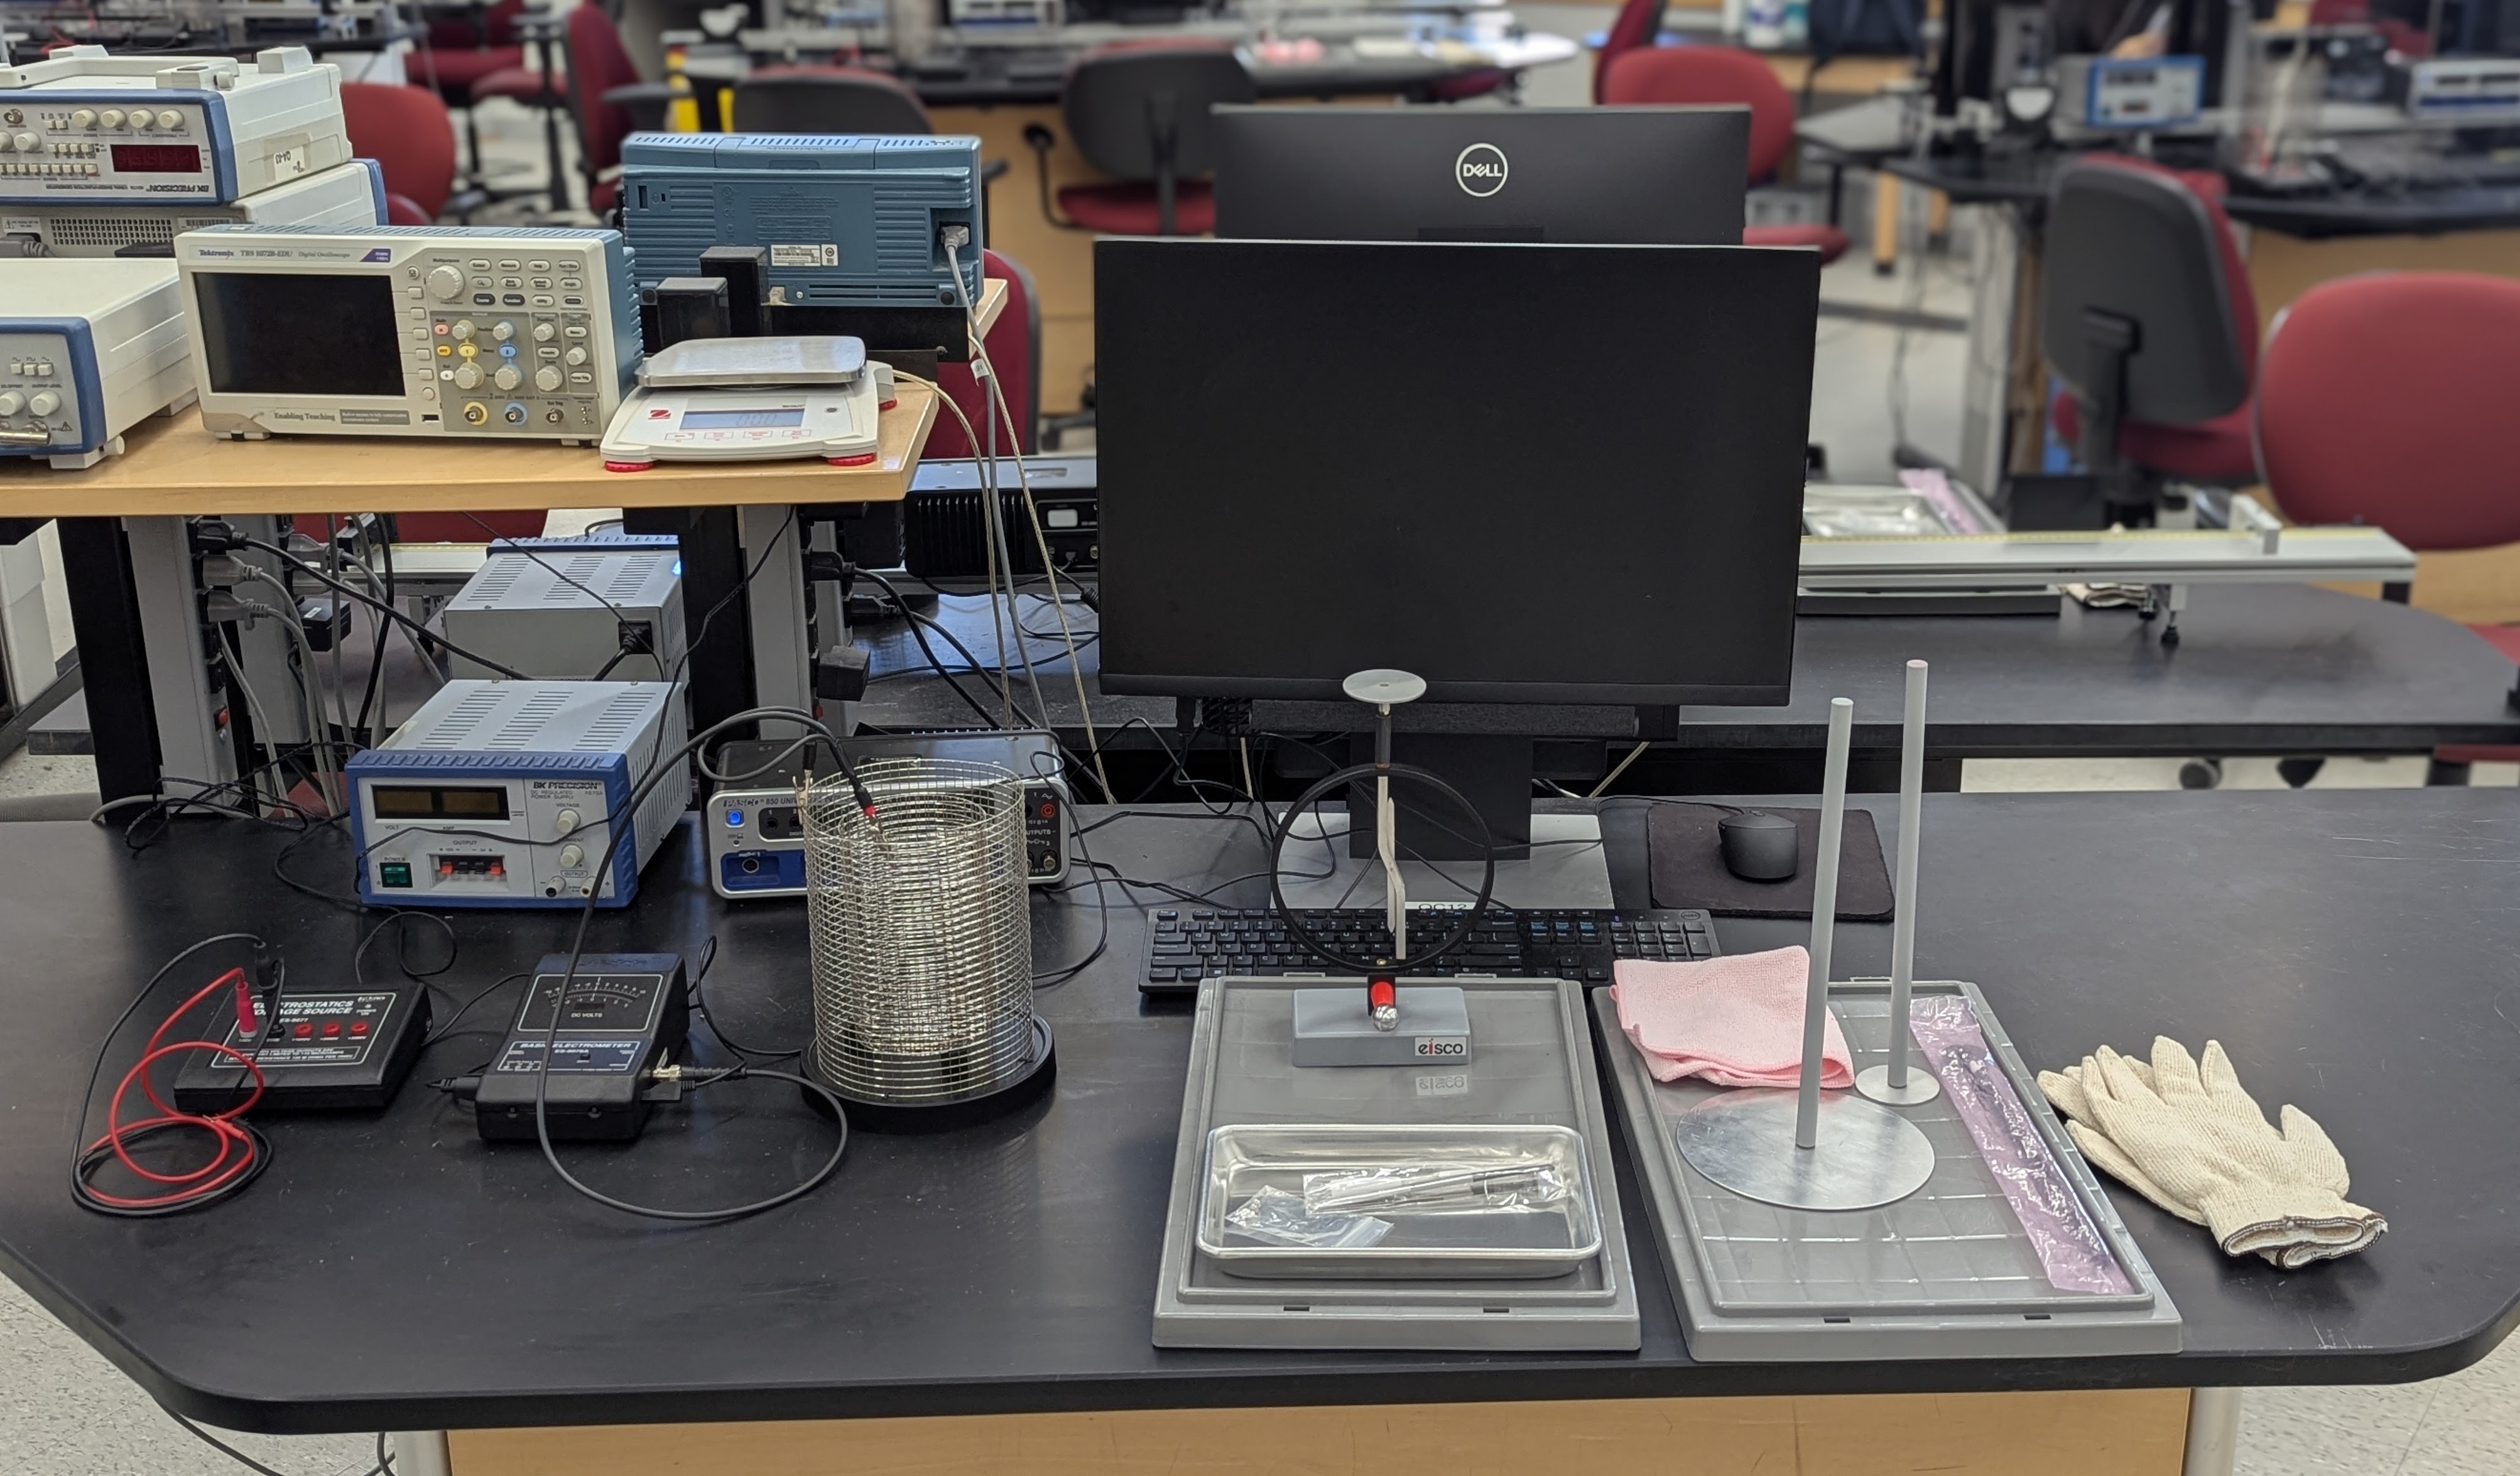
Additional Images below:
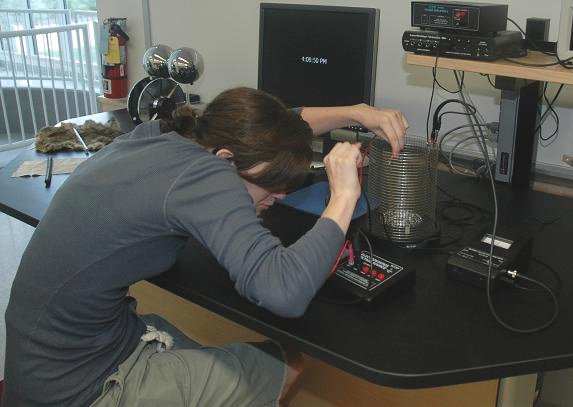
The Faraday Ice Pail Set up. More Detailed Pictures Below (Click Image or Scroll)
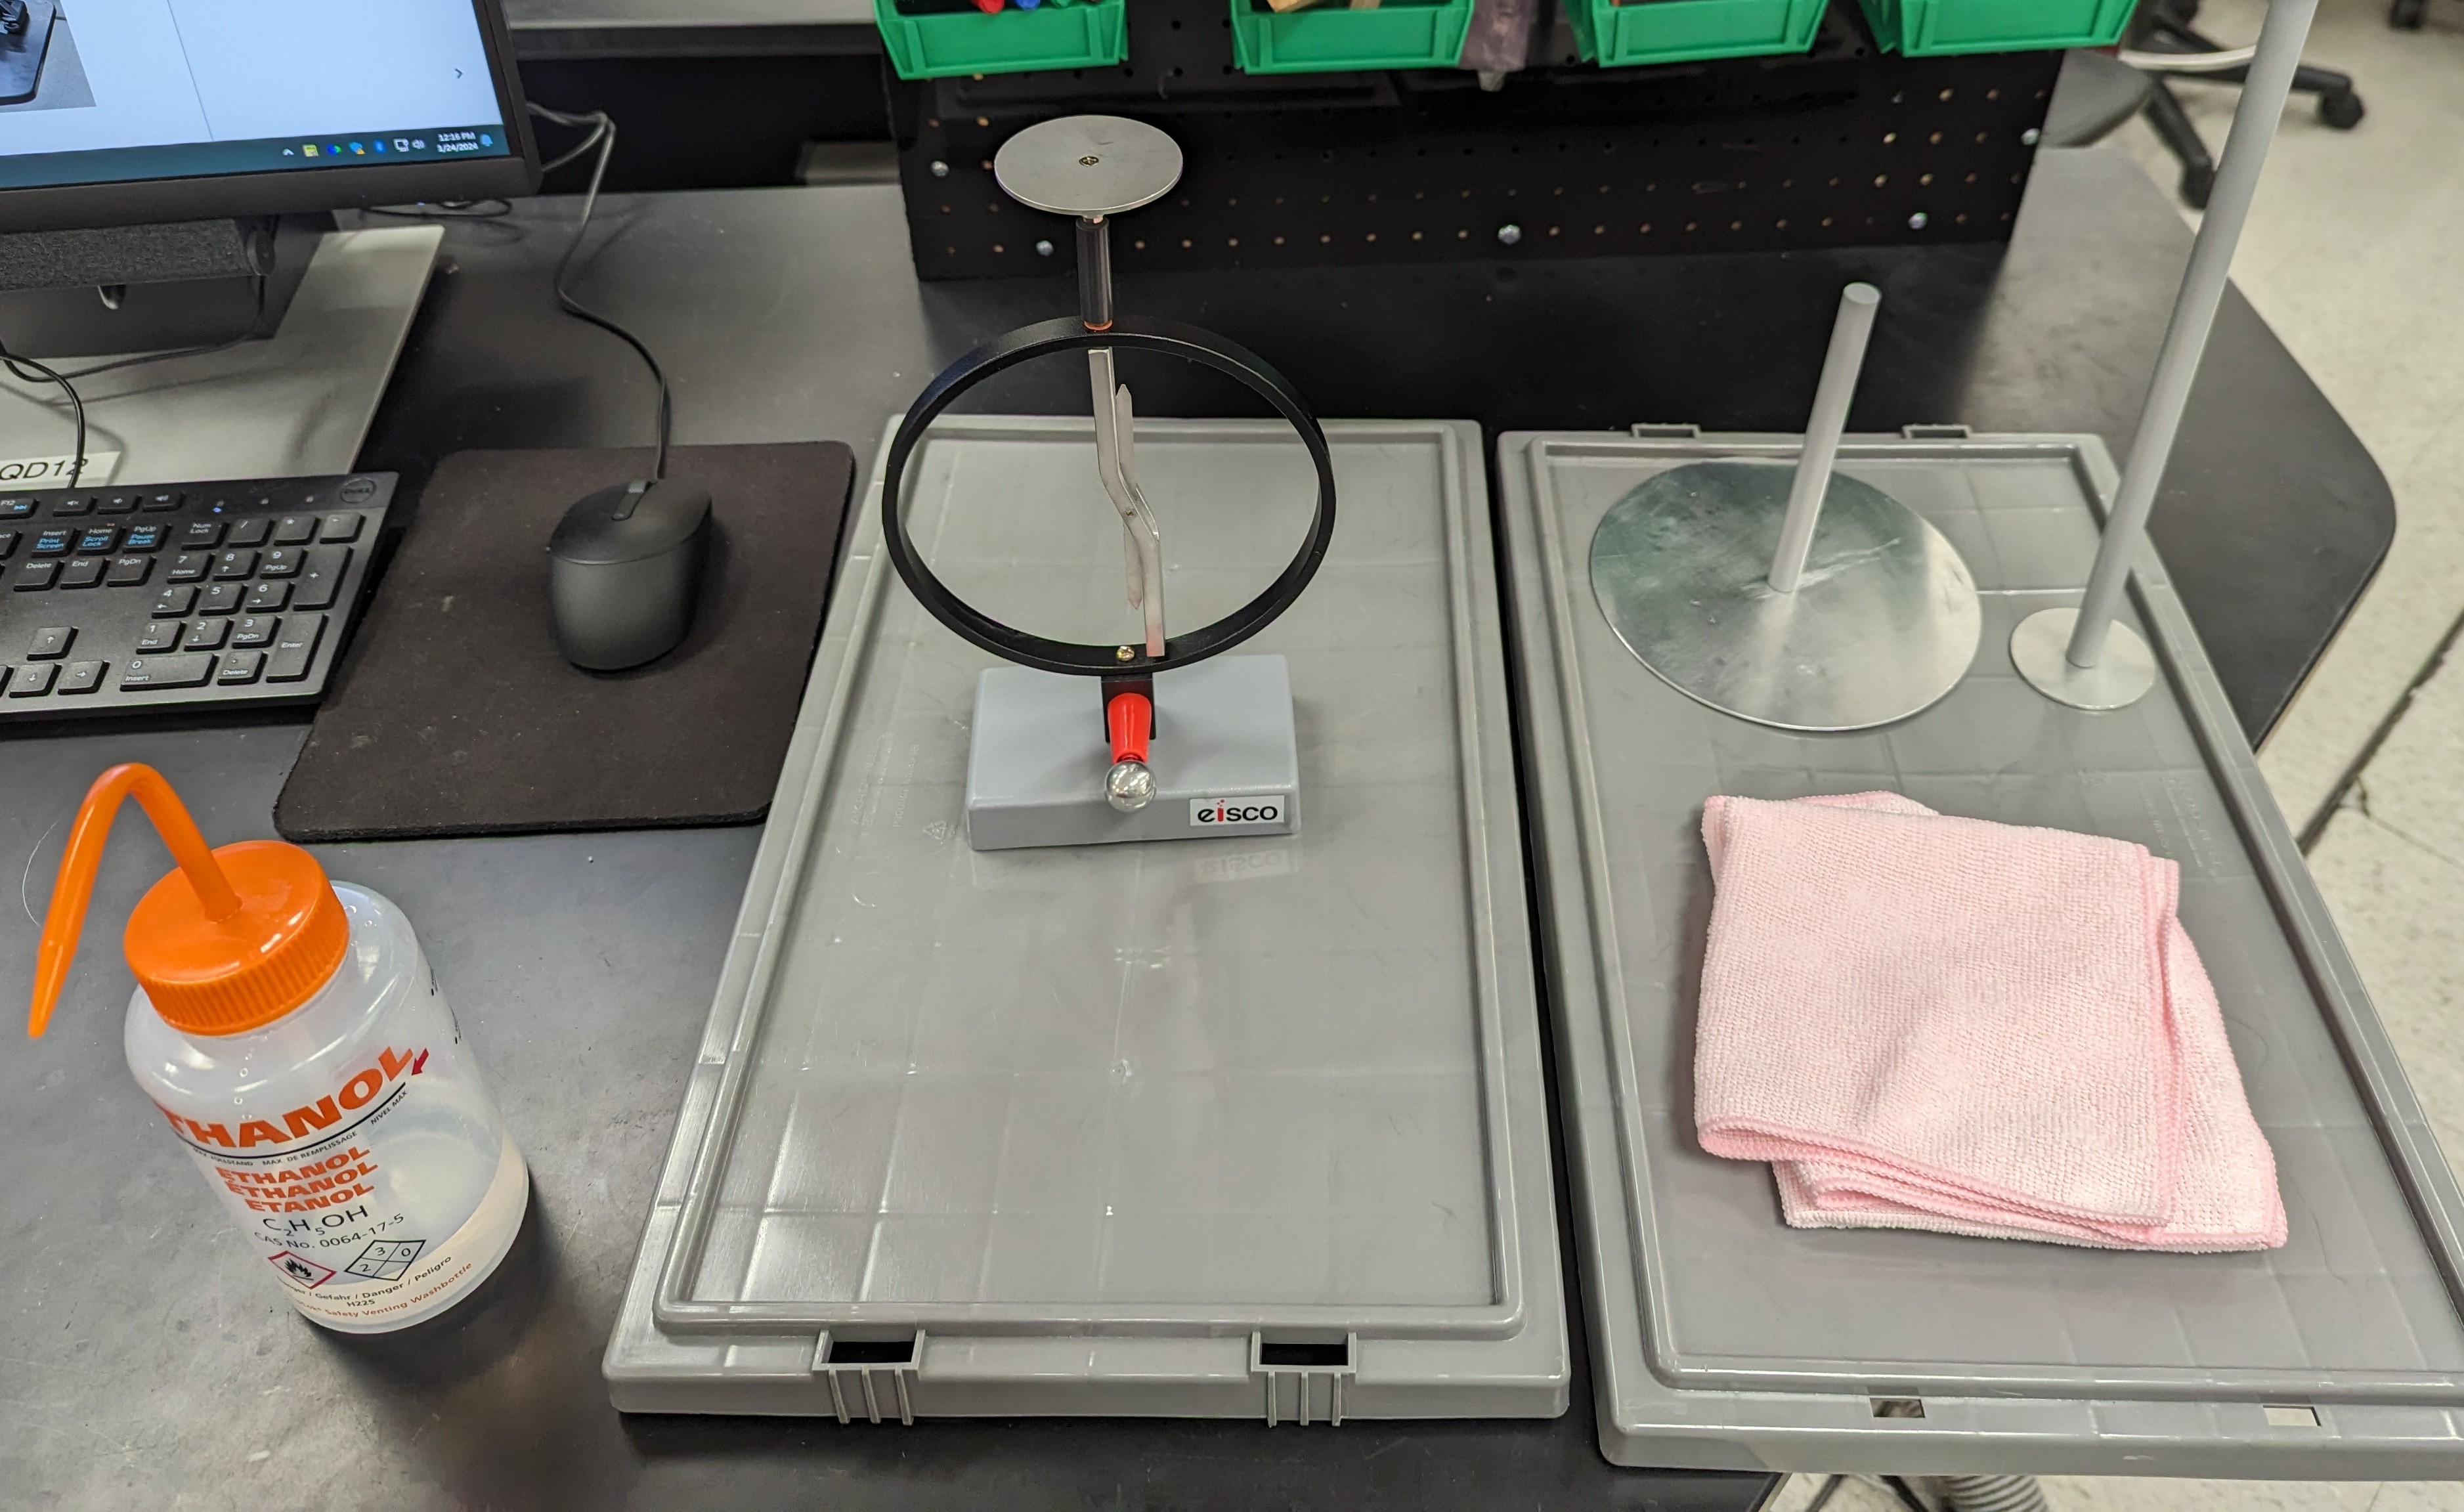
The way things should be placed on the plastic lids (electrophorus). Do not leave alcohol on the tables.
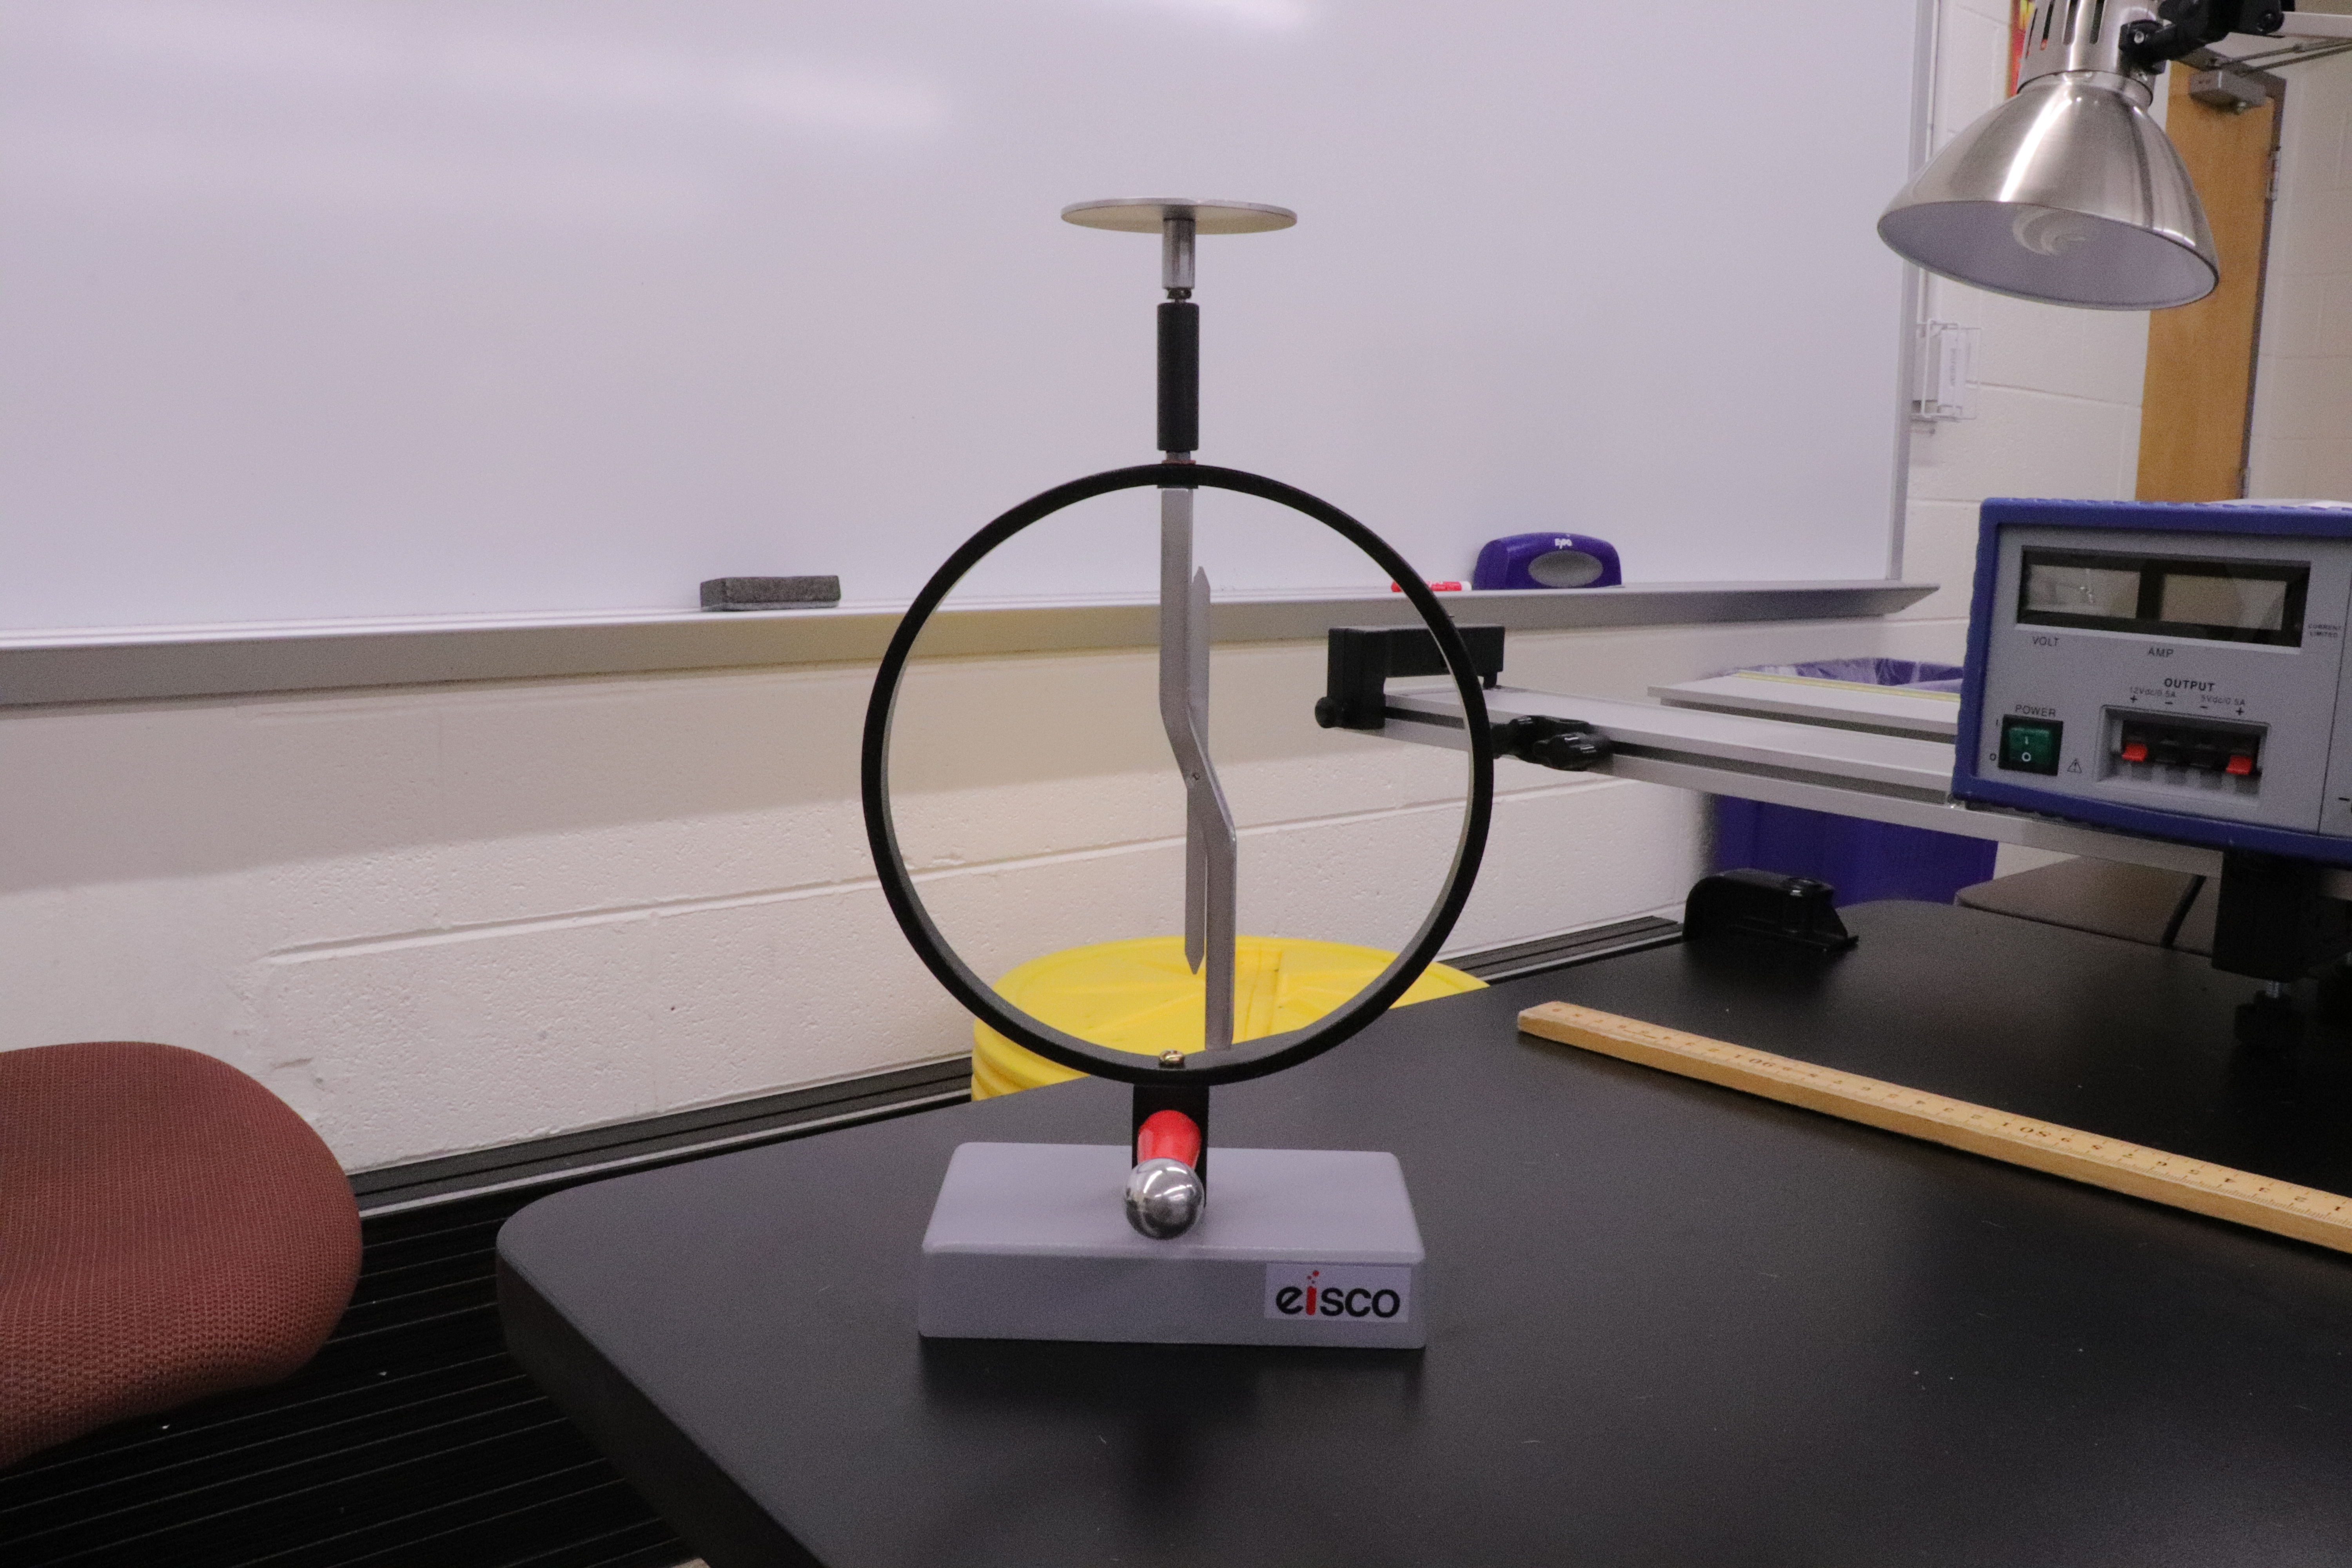
The electroscope I guess
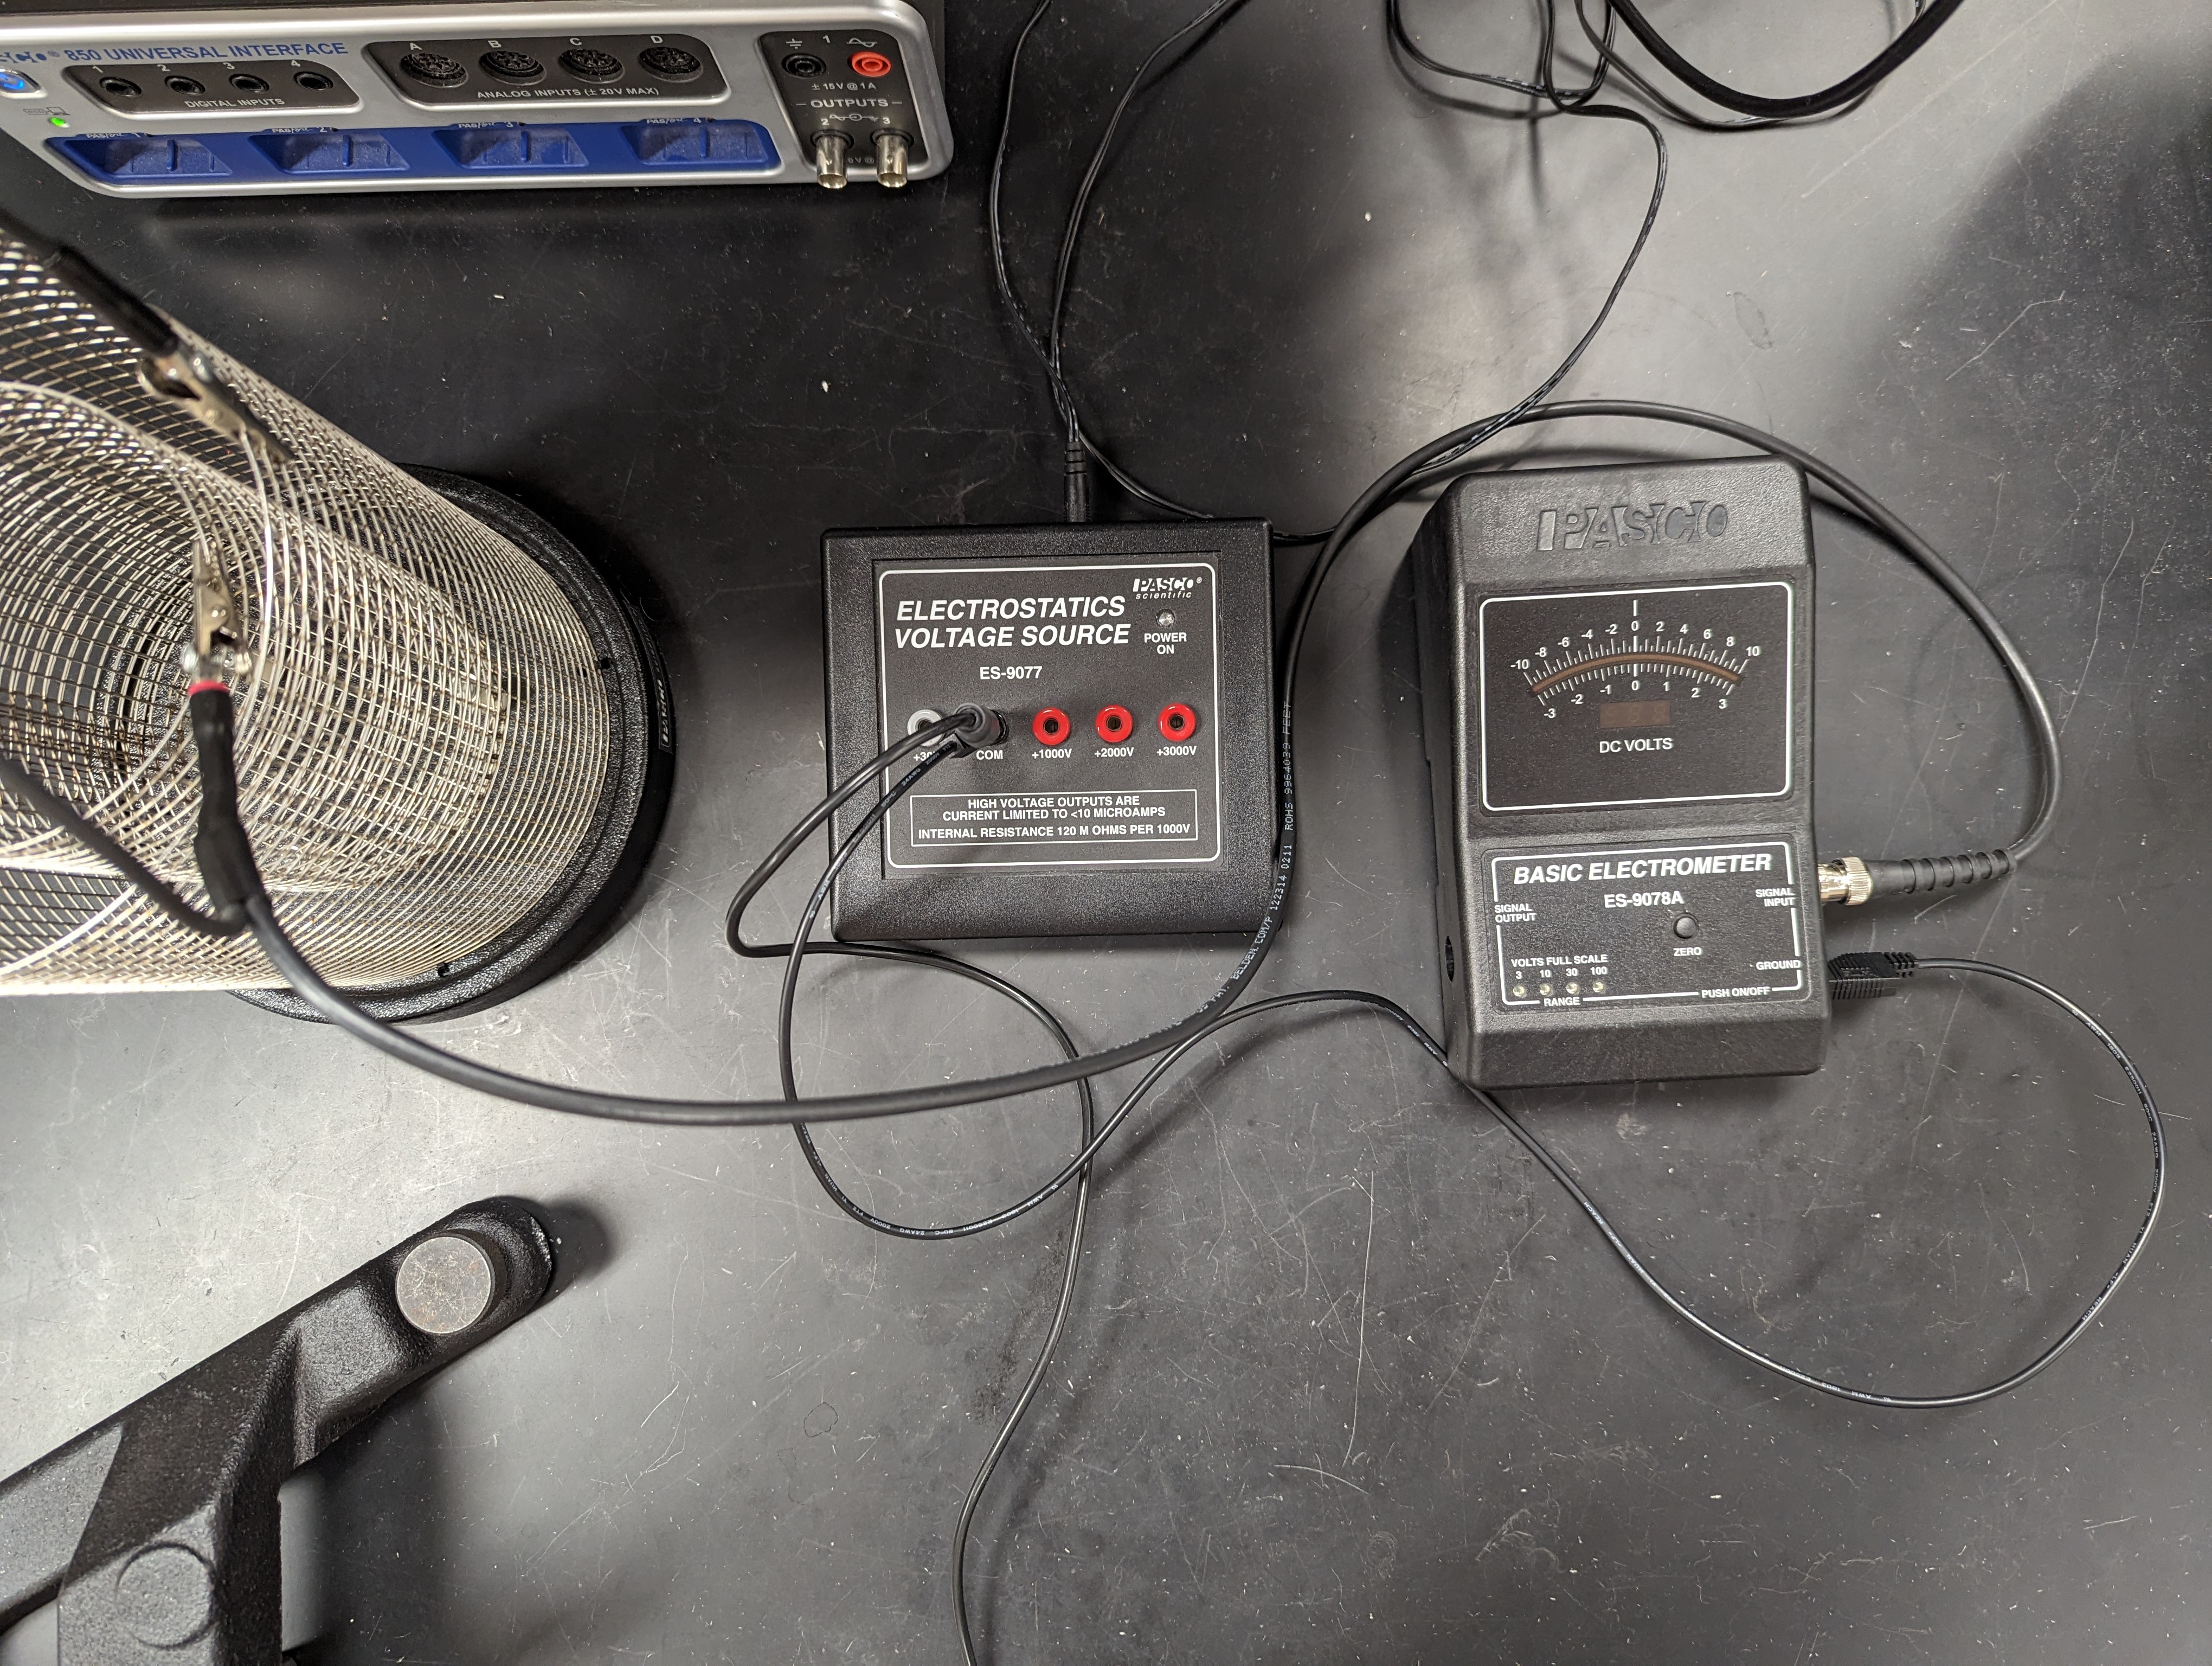
Faraday Ice Pail and Electrometer Set up Instructions Below:
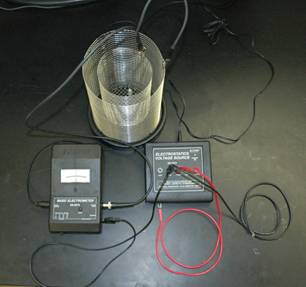
Ice Pail wiring and set up. Note that the black clip goes on the outside and the red clip foes on the inside.
Wires connected to the Electrometer
The Electrometer has 3 wires plugged into it:
- The 8 pin DIN to smaller 8 pin wire is plugged into the singal output socket on the left side.
- The other end of this wire is plugged into Analog A of the interface.
- The BNC to alligator wire is plugged into the Coaxial BNC jack on the right side.
- The other end of this wire is clipped onto the Ice Pail
- The black banana to banana wire is plugged into the ground socket on the right side.
- The other end of this wire is plugged into the com socket of the power source.
The Power Source must be turned on with the switch in the back to work.

The electrometer (analog) with everything plugged in
Wires connected to the Power Source
The Power source has 4 wires plugged into it:
- The red spade to banana wire is plugged into the +30V socket.
- The black banana to banana wire is plugged into the com socket.
- The other end of this wire is plugged into the ground socket of the electrometer.
- The black banana to spade wire is plugged into the banana to banana plug above.
- The power supply is plugged into the back of the power source.
The Power Source must be turned on with the switch in the back to work.
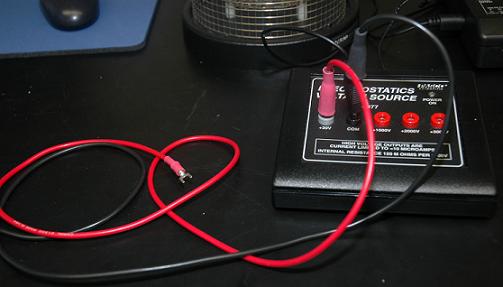
The Electrostatics Power Supply with everything plugged in.
Wires connected to the Faraday Ice Pail
The alligator clips in the image to the right are from the BNC to alligator wire. On one end it is connected to the electrometer, and the other end is clipped on the ice pail.
They are clipped with Red on the Inside, and Black on the outside.


![[HOME]](../../images/Mis/home2.GIF)
![[PREV]](../../images/Mis/arrow2.GIF)
![[PREV]](../../images/Mis/arrownew.gif)