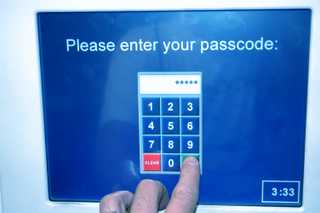
Logging into the system
- To activate the touch panel touch the screen.
- Type in the access code for physics to log into the system. If you don't know the password click here.
|
 |
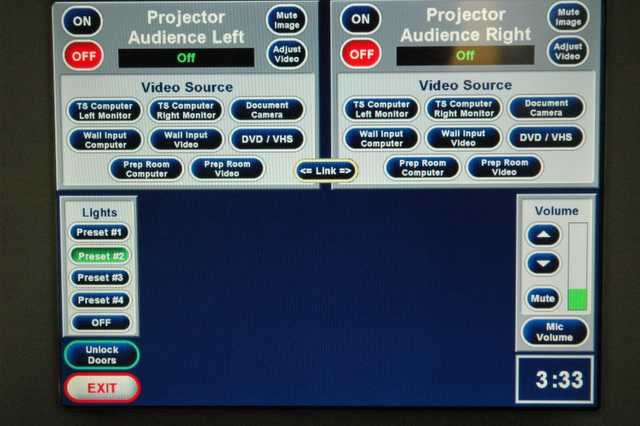
Using a Single Video Input
- The default setting is to display the same video input on both projectors. If a different video inputs are to be displayed on each of the projectors select "Advanced Source Selection" (see Using Multiple Video Inputs below).
- Select the input device that you will be using. Click here for a list of common A/V configuration options and when you might want to use them. Each demonstration that uses A/V will also have a description of how configure the A/V options.
- After selecting the desired input device the projectors will automatically switch on. You will need to wait until they have warmed up (2-3 minutes) before anything will be displayed your selected input. The projectors will remain on until you exit or explicitly press the "off" button even if you change input device later in your lecture. Caution, if you accidently turn off the video projectors you will have to wait until they have cooled down (3-4 minutes) before they can be turned back on again.
|
 |
Using Multiple Video Inputs
- When a different video input is to be displayed on each of the Epson video projectors select "Advanced Source Selection".
- Select the input video device of each of the projectors.
- If you want to go back to the single video input mode as descibed above press the "Link" button between the two projector control panels. This will link the two projectors to the same video input.
|
 |
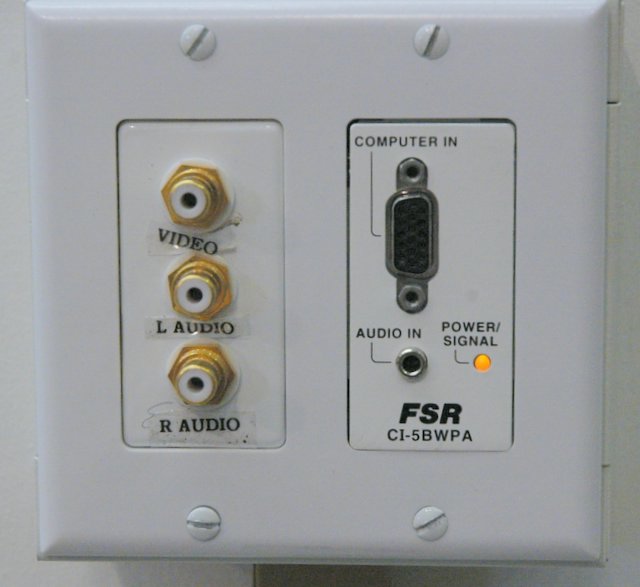
Using the Wall or Preperation Room Video Inputs
- There are input boxes on the wall next to the Crestron controller and inside the preparation room (CHEMP 130A) that can be used as the audio/video input source. The connectors include 'RCA' style recepticles for composite video and left and right audio channels, and 'VGA' and mini stereo phone recepticles for computers. Select "Wall Input Video" on the control panel for the 'RCA' recepticles. Select "Wall Input Computer" on the control panel for the 'VGA' and mini stereo phone recepticles.
|
 |
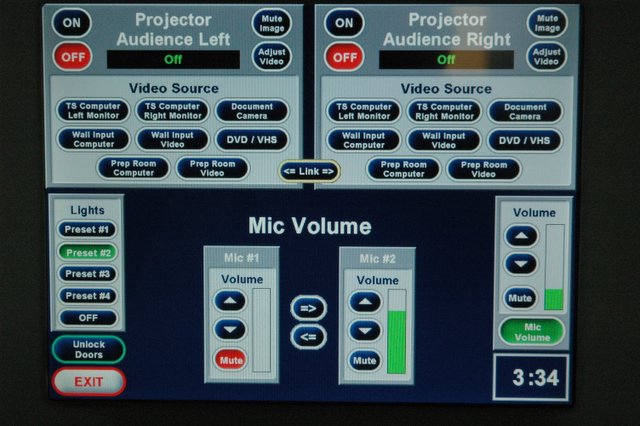
Controlling Microphone and Audio Inputs
- The default audio input is the selected video input. For example if the DVD player is selected then the audio channel for the DVD will automatically be selected.
- The audio volume can be controlled by the master volume control. Generally adjusting the individual microphone volume levels is not require. However, if the volume of the individual microphones needs to be adjusted press "Mic Volume". Two volume controls will be displayed and the individual volumes can be adjusted.
- The most common problem with the mircophones is that their batteries must be changed about every 6-8 hours. For additional information on the wireless mircrophones follow the link.
|
 |
Shutting Down the Audio/Video System
- It is important that after each class that the instrutor shut down the Audio/Video system. This is done simply by pressing the exit button on the control panel. If the projectors are left on for extended periods of time their bulb life is needlessly wasted. The bulb are extremely expensive and difficult to replace. Caution, if you accidently turn off the video projectors you will have to wait until they have cooled down (3-4 minutes) before they can be turned back on again.
|
|
![[Virginia Tech Department of Physics]](../../images/Mis/vtphyslogo2.gif)
Virginia Tech Physics
Lecture demo list