Don't you wish it was still this easy?
Equipment List:
- 850 Interface with:
- ElectrometerPowered by 4 AA Batteries
- Electroscope with:
- Small Electroscope Plate in the bottom.
- Small Electroscope Ball in the top.
- Faraday Ice Pail
- Electrostatic Power Supply powered by an Electrostatic Power Supply AC Adapter Please note that there are two types and they are all compatible with one another.
- Electrostatics Cable Bag with the following items:
- 8 pin DIN to Mini - DIN cord Small End in the Electrometer and large end in Analog A
- BNC to Alligator Cord Electrostatics type BNC end connected to the Electrometer and Alligators connected to the faraday cage, Red on the inner pail and Black on the outer pail.
- Banana Plug Cord - Black One End plugged into the ground port of the electrometer and the other into the"COM" port of the electrostatic power supply.
- Banana to Spade Cord - Black Bannana End in Black Banana Plug cord already plugged into the "COM" port of the eletrostatic power supply and spade end loose.
- Banana to Spade Cord - Red Bannana End in the "+30V" port of the power supply and spade end loose.
- Charge Wand with:
- Large Wand Plate attached
- Small Wand Plate Loose
- 2 x Charge Wand Screw Holding the small plate in
- 2 x PVC Condenser Plate Wand - Long
- Proof Plane
- Conductive Tray
- 3 x Ball Bearings in Bags
- Tweezers
- 2 x Lid Electrophorus
- Microfiber Cloth
- One Meter stick
- Ruler Metric 30cm
General Class Use :
- Place a stack of Microfiber Cloths at each TA table.
- Make sure there is a Laundry Bag for each quad.
- Isopropyl Alcohol
- Box of Kim Wipes
Notes and tests:
- Clean the plastic parts of wands, electroscopes,lids, and proof planes with kim wipes and alcohol. Be sure to wear gloves and other PPE
- Follow This Guide to hook up the electrometer and ice pail.
- Load the 2306 test file“2306 Lab 3 test.cap” and click “start”.
- Set the electrometer to the 100 V scale and turn it on. A green indicator light should display on the front panel. If the green indicator light is blinking the batteries need to be replaced. The batteries are easily knocked out of their holder. If the electrometer doesn’t work check to see that they are installed properly.
- Touch a lead connected to the 30 V output of the voltage source to the in cylinder of the Ice Pail and check to see if the electrometer reads about 30 V. Then touch the ground spade to the same cylinder to dissipate the charge.
It's a lot...
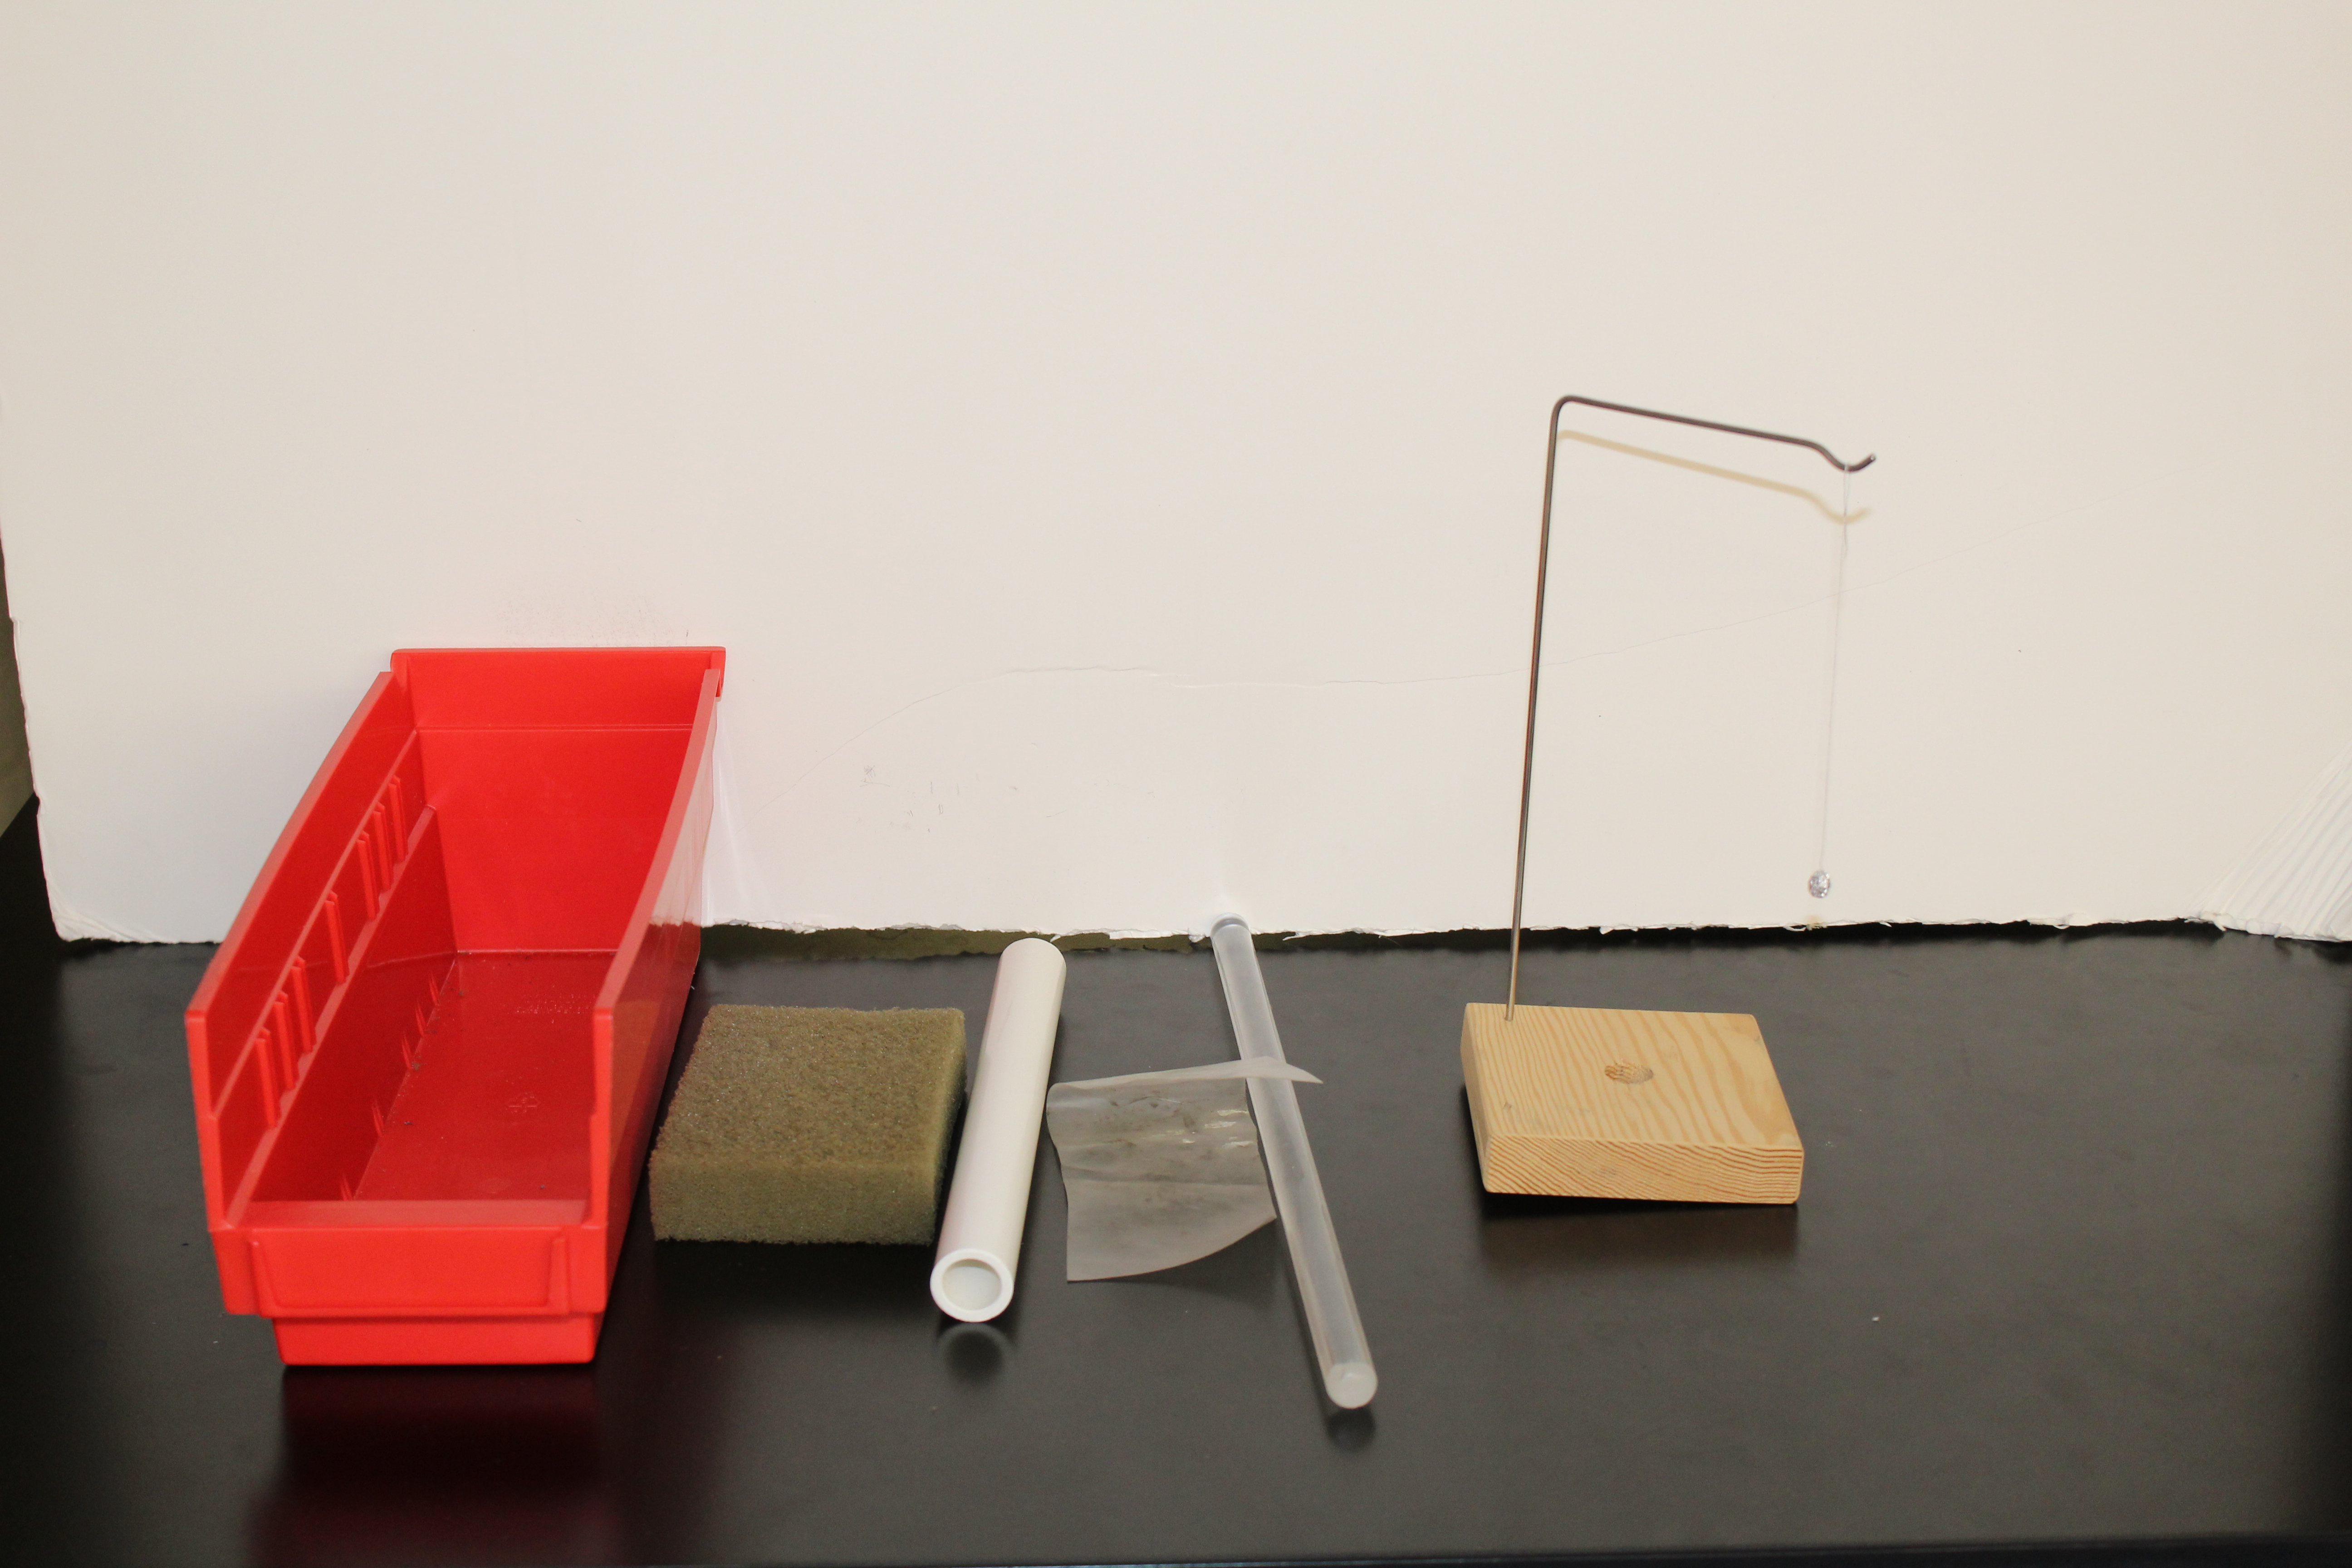
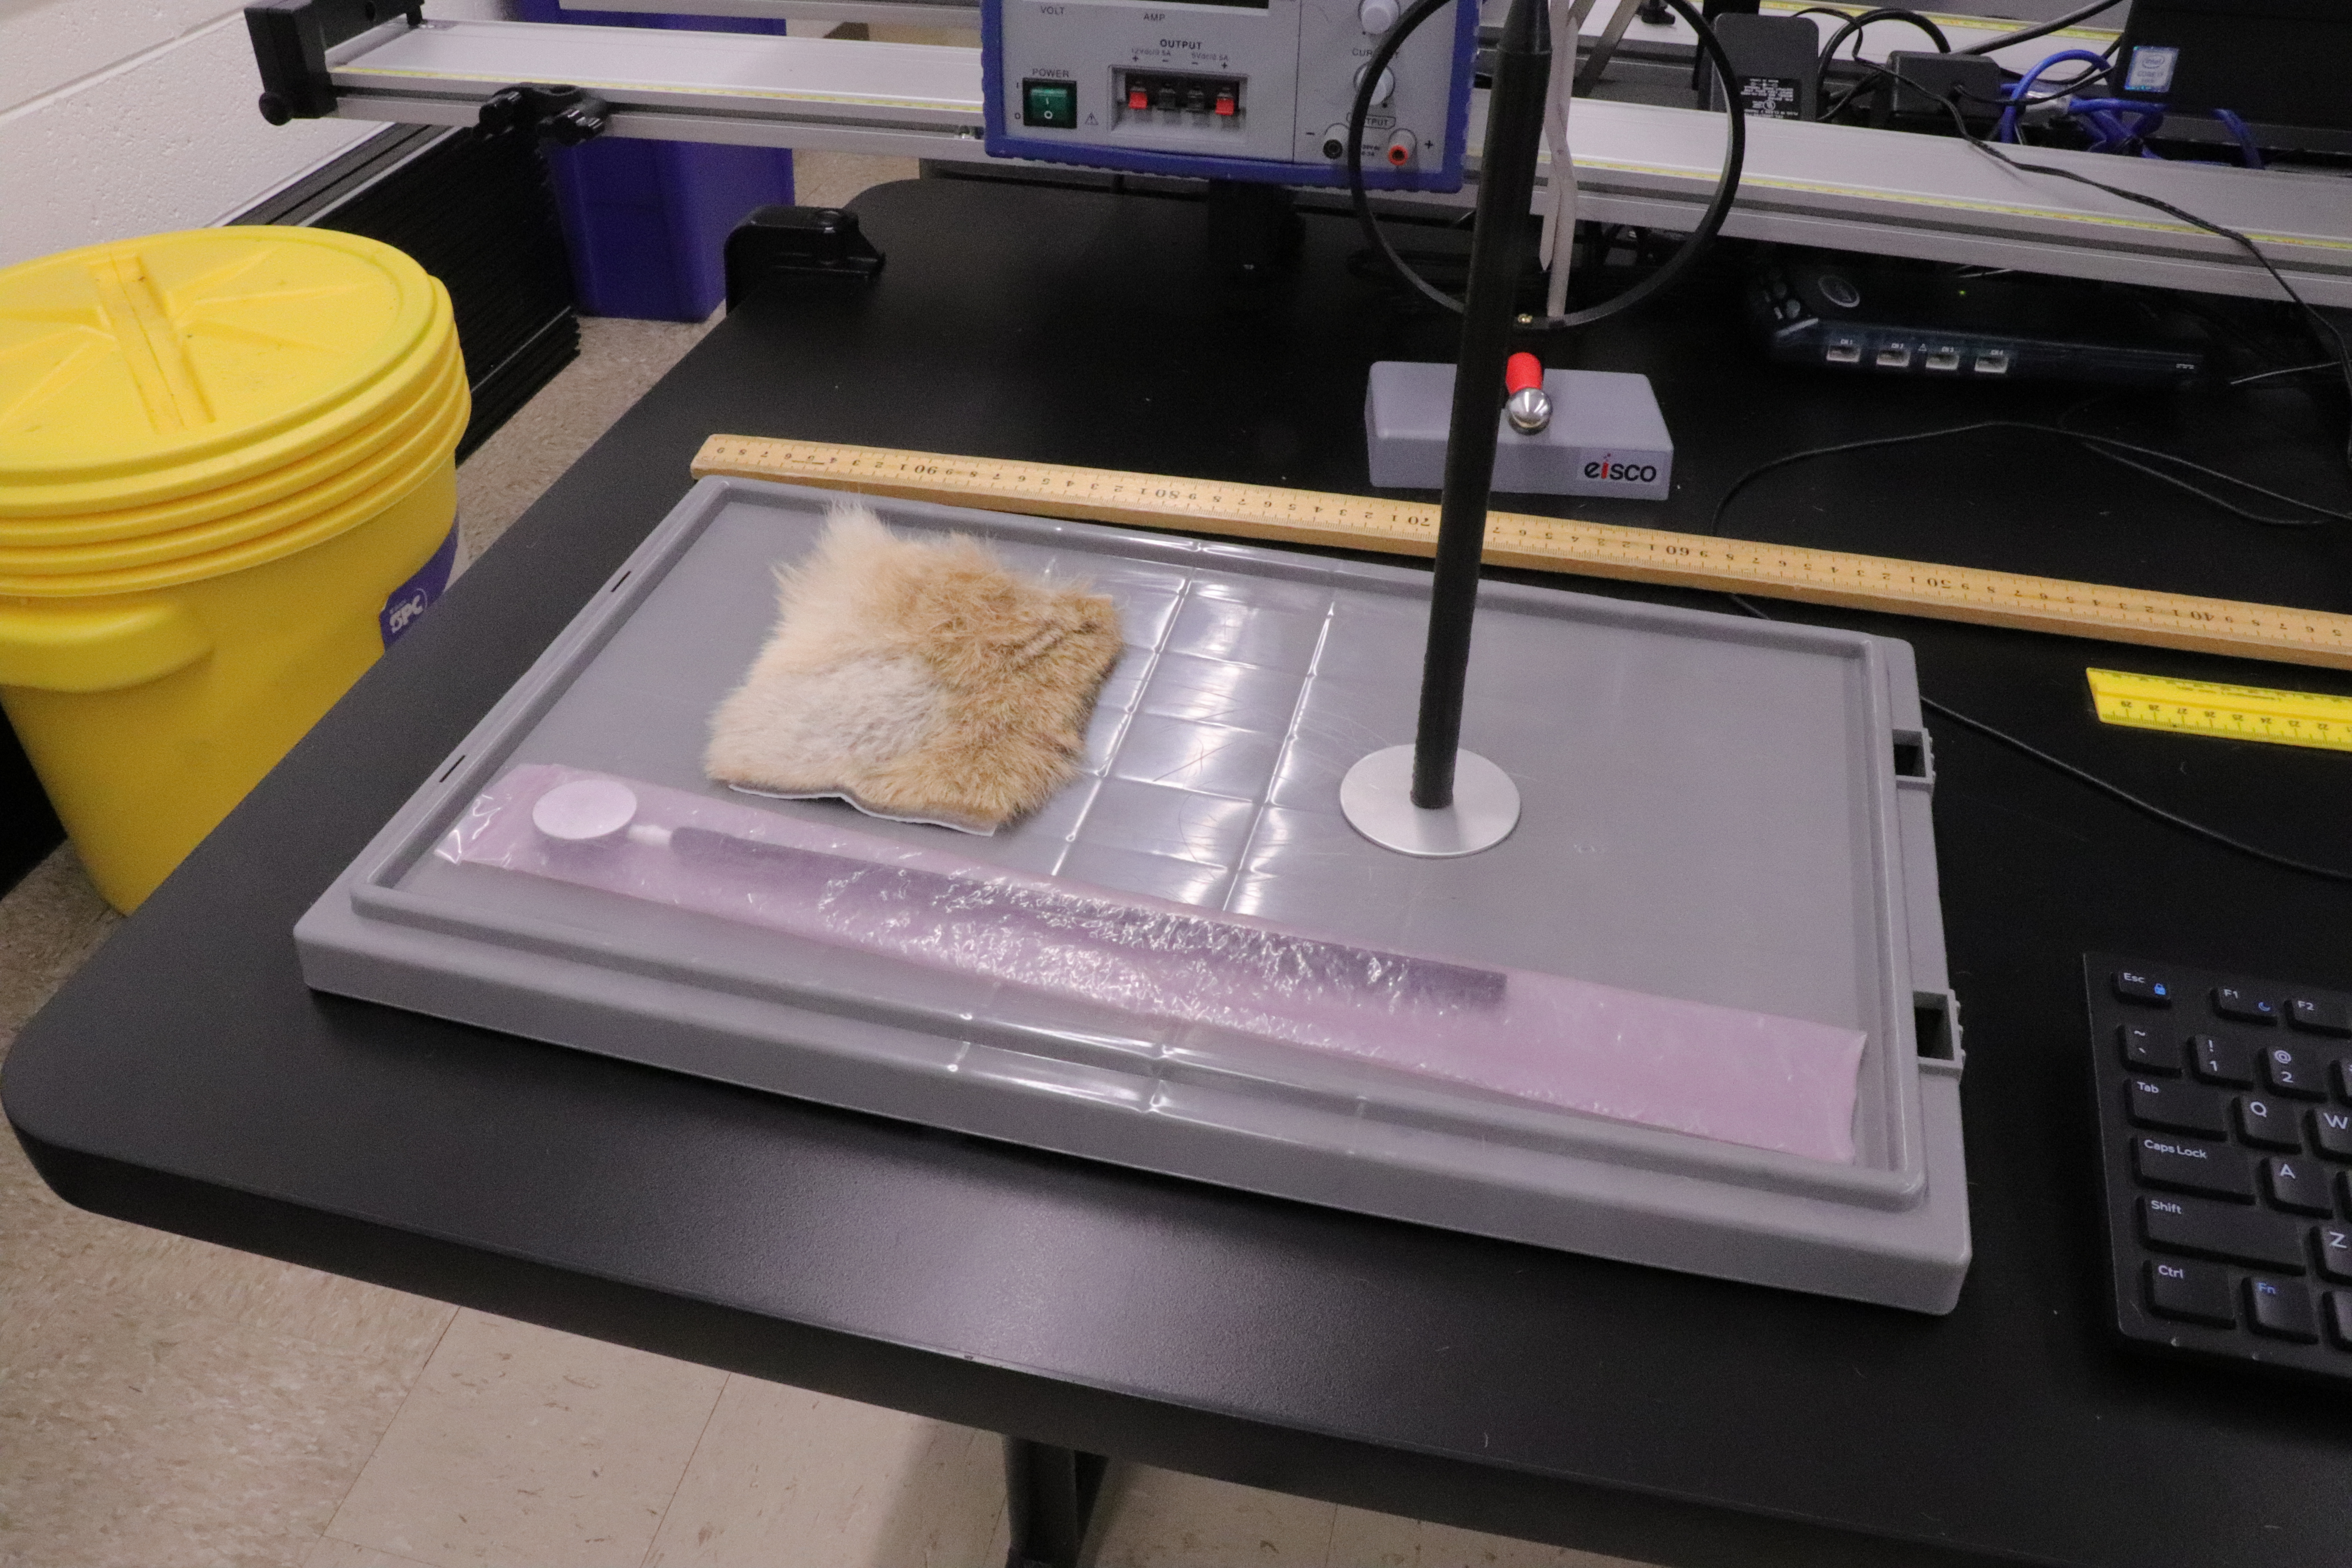
Additional Images below:
Neatly store what you can on top of the lid.
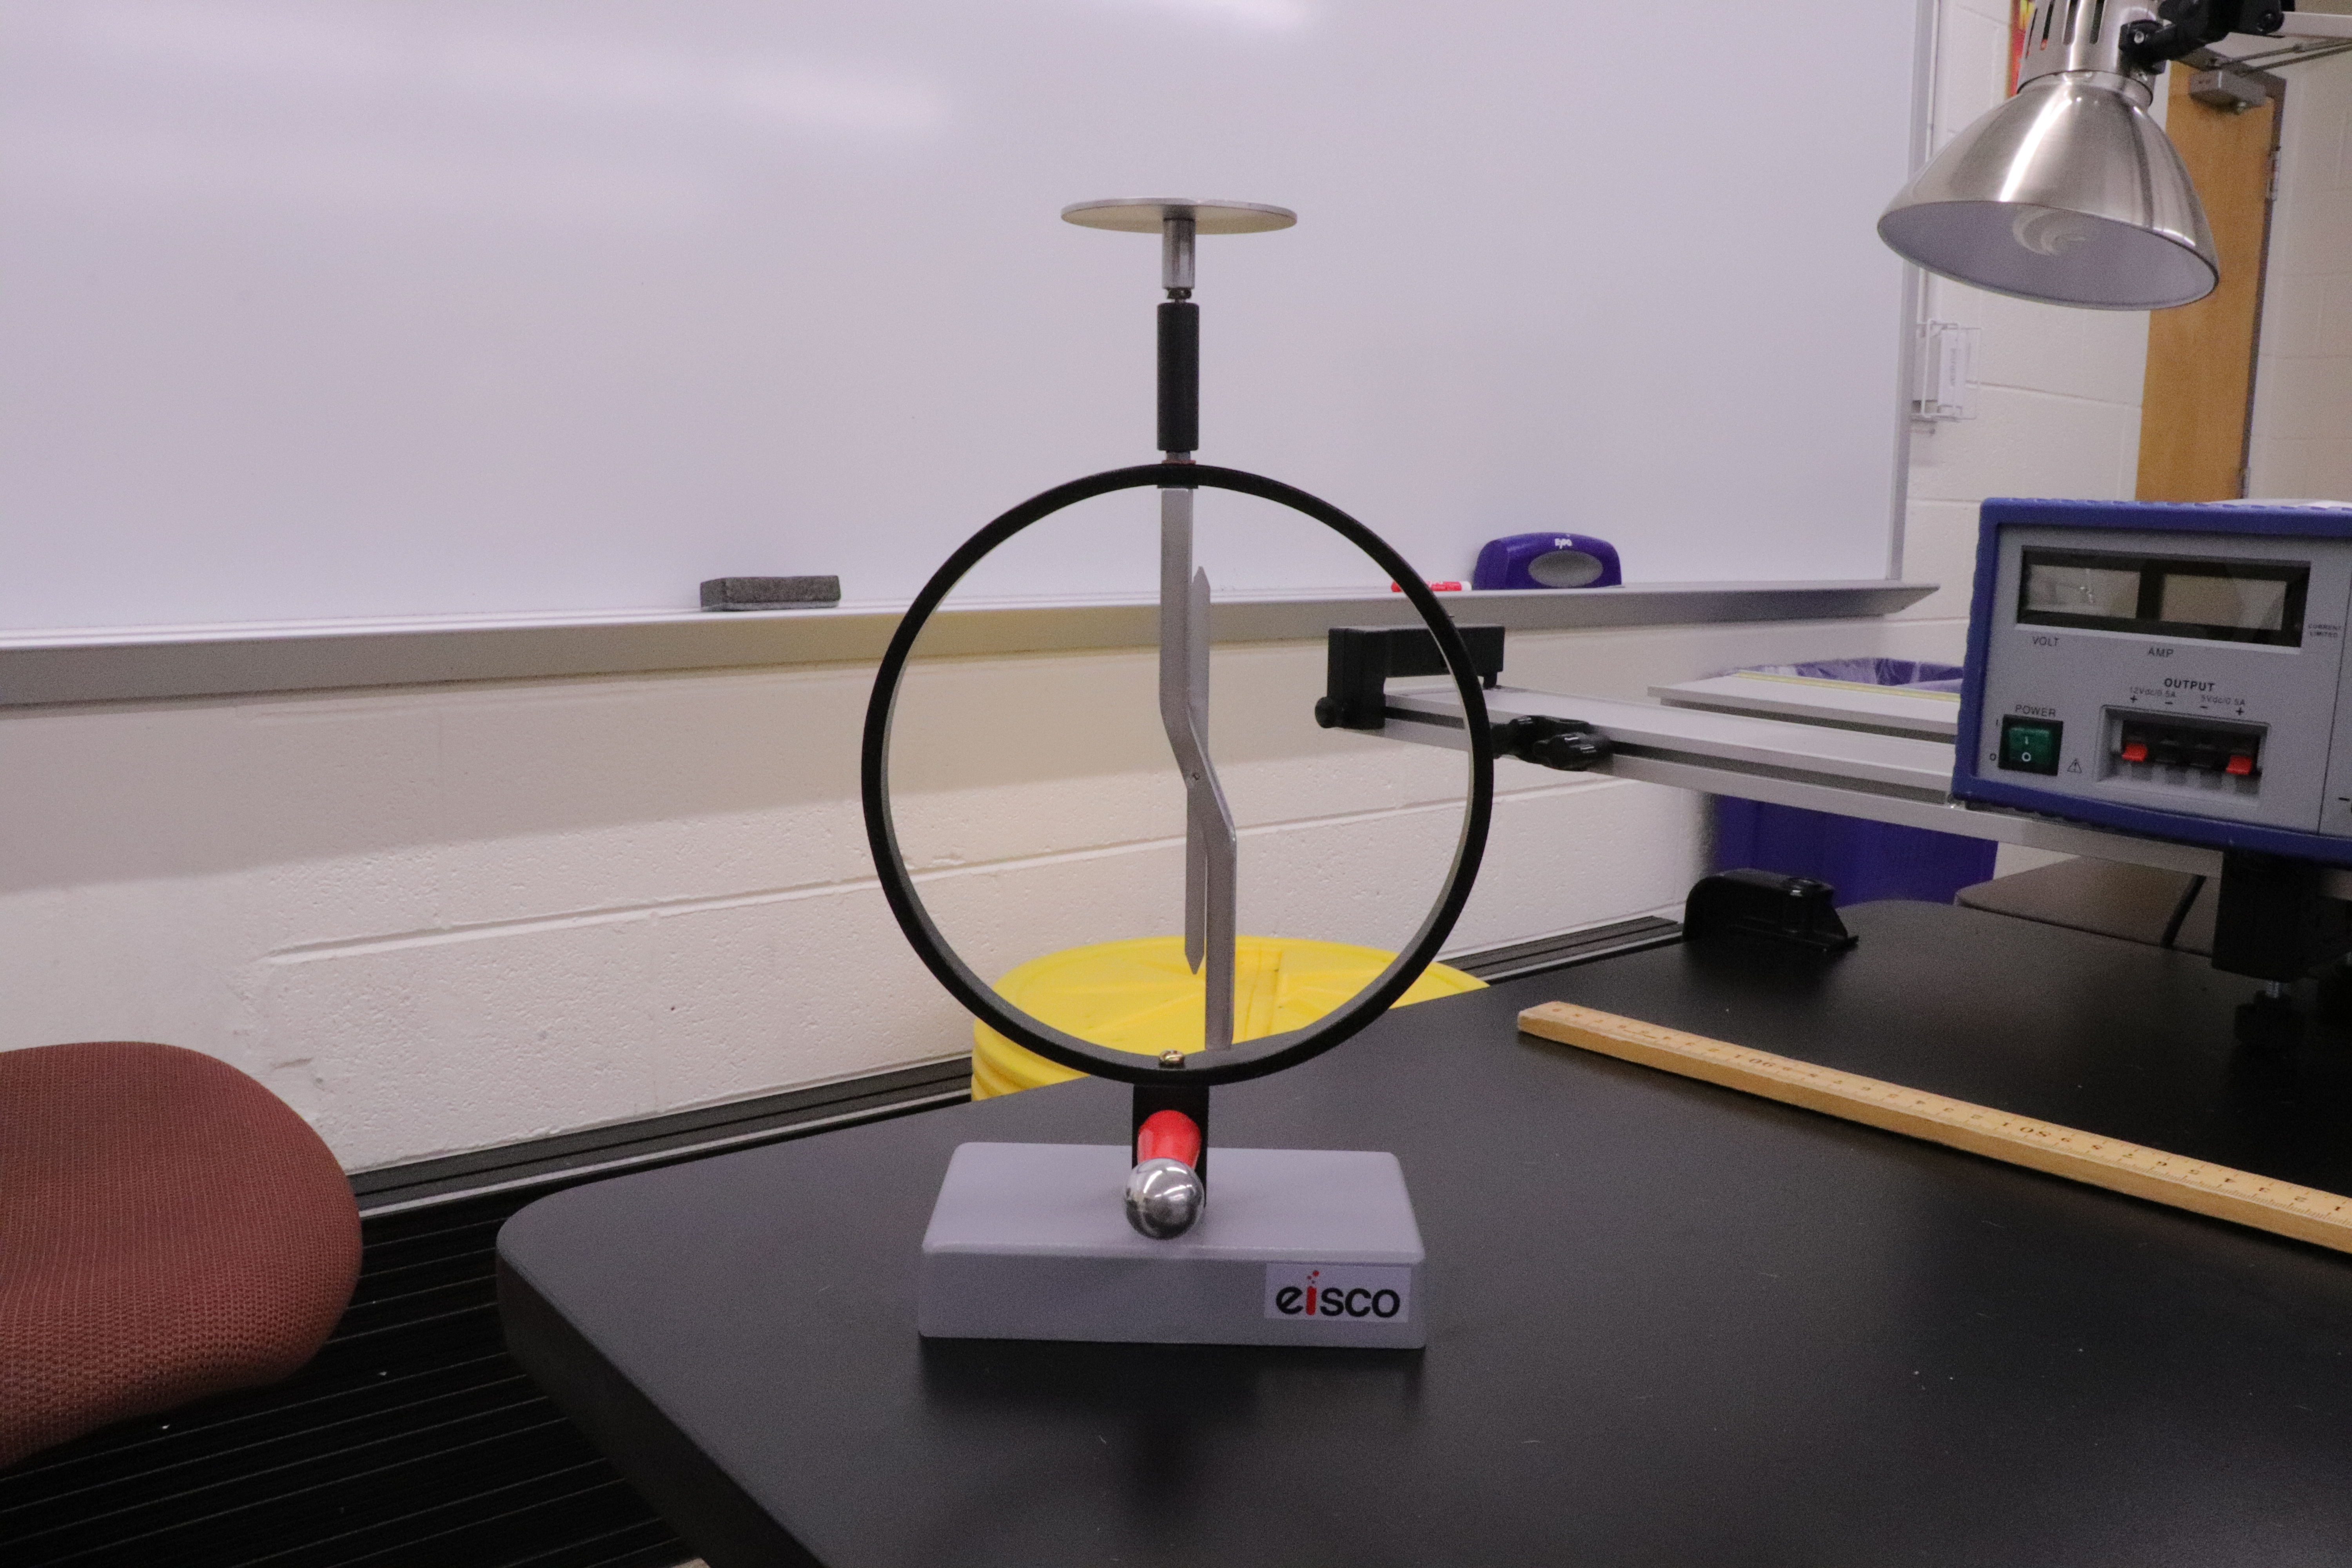
The electroscope should look like this when put out.
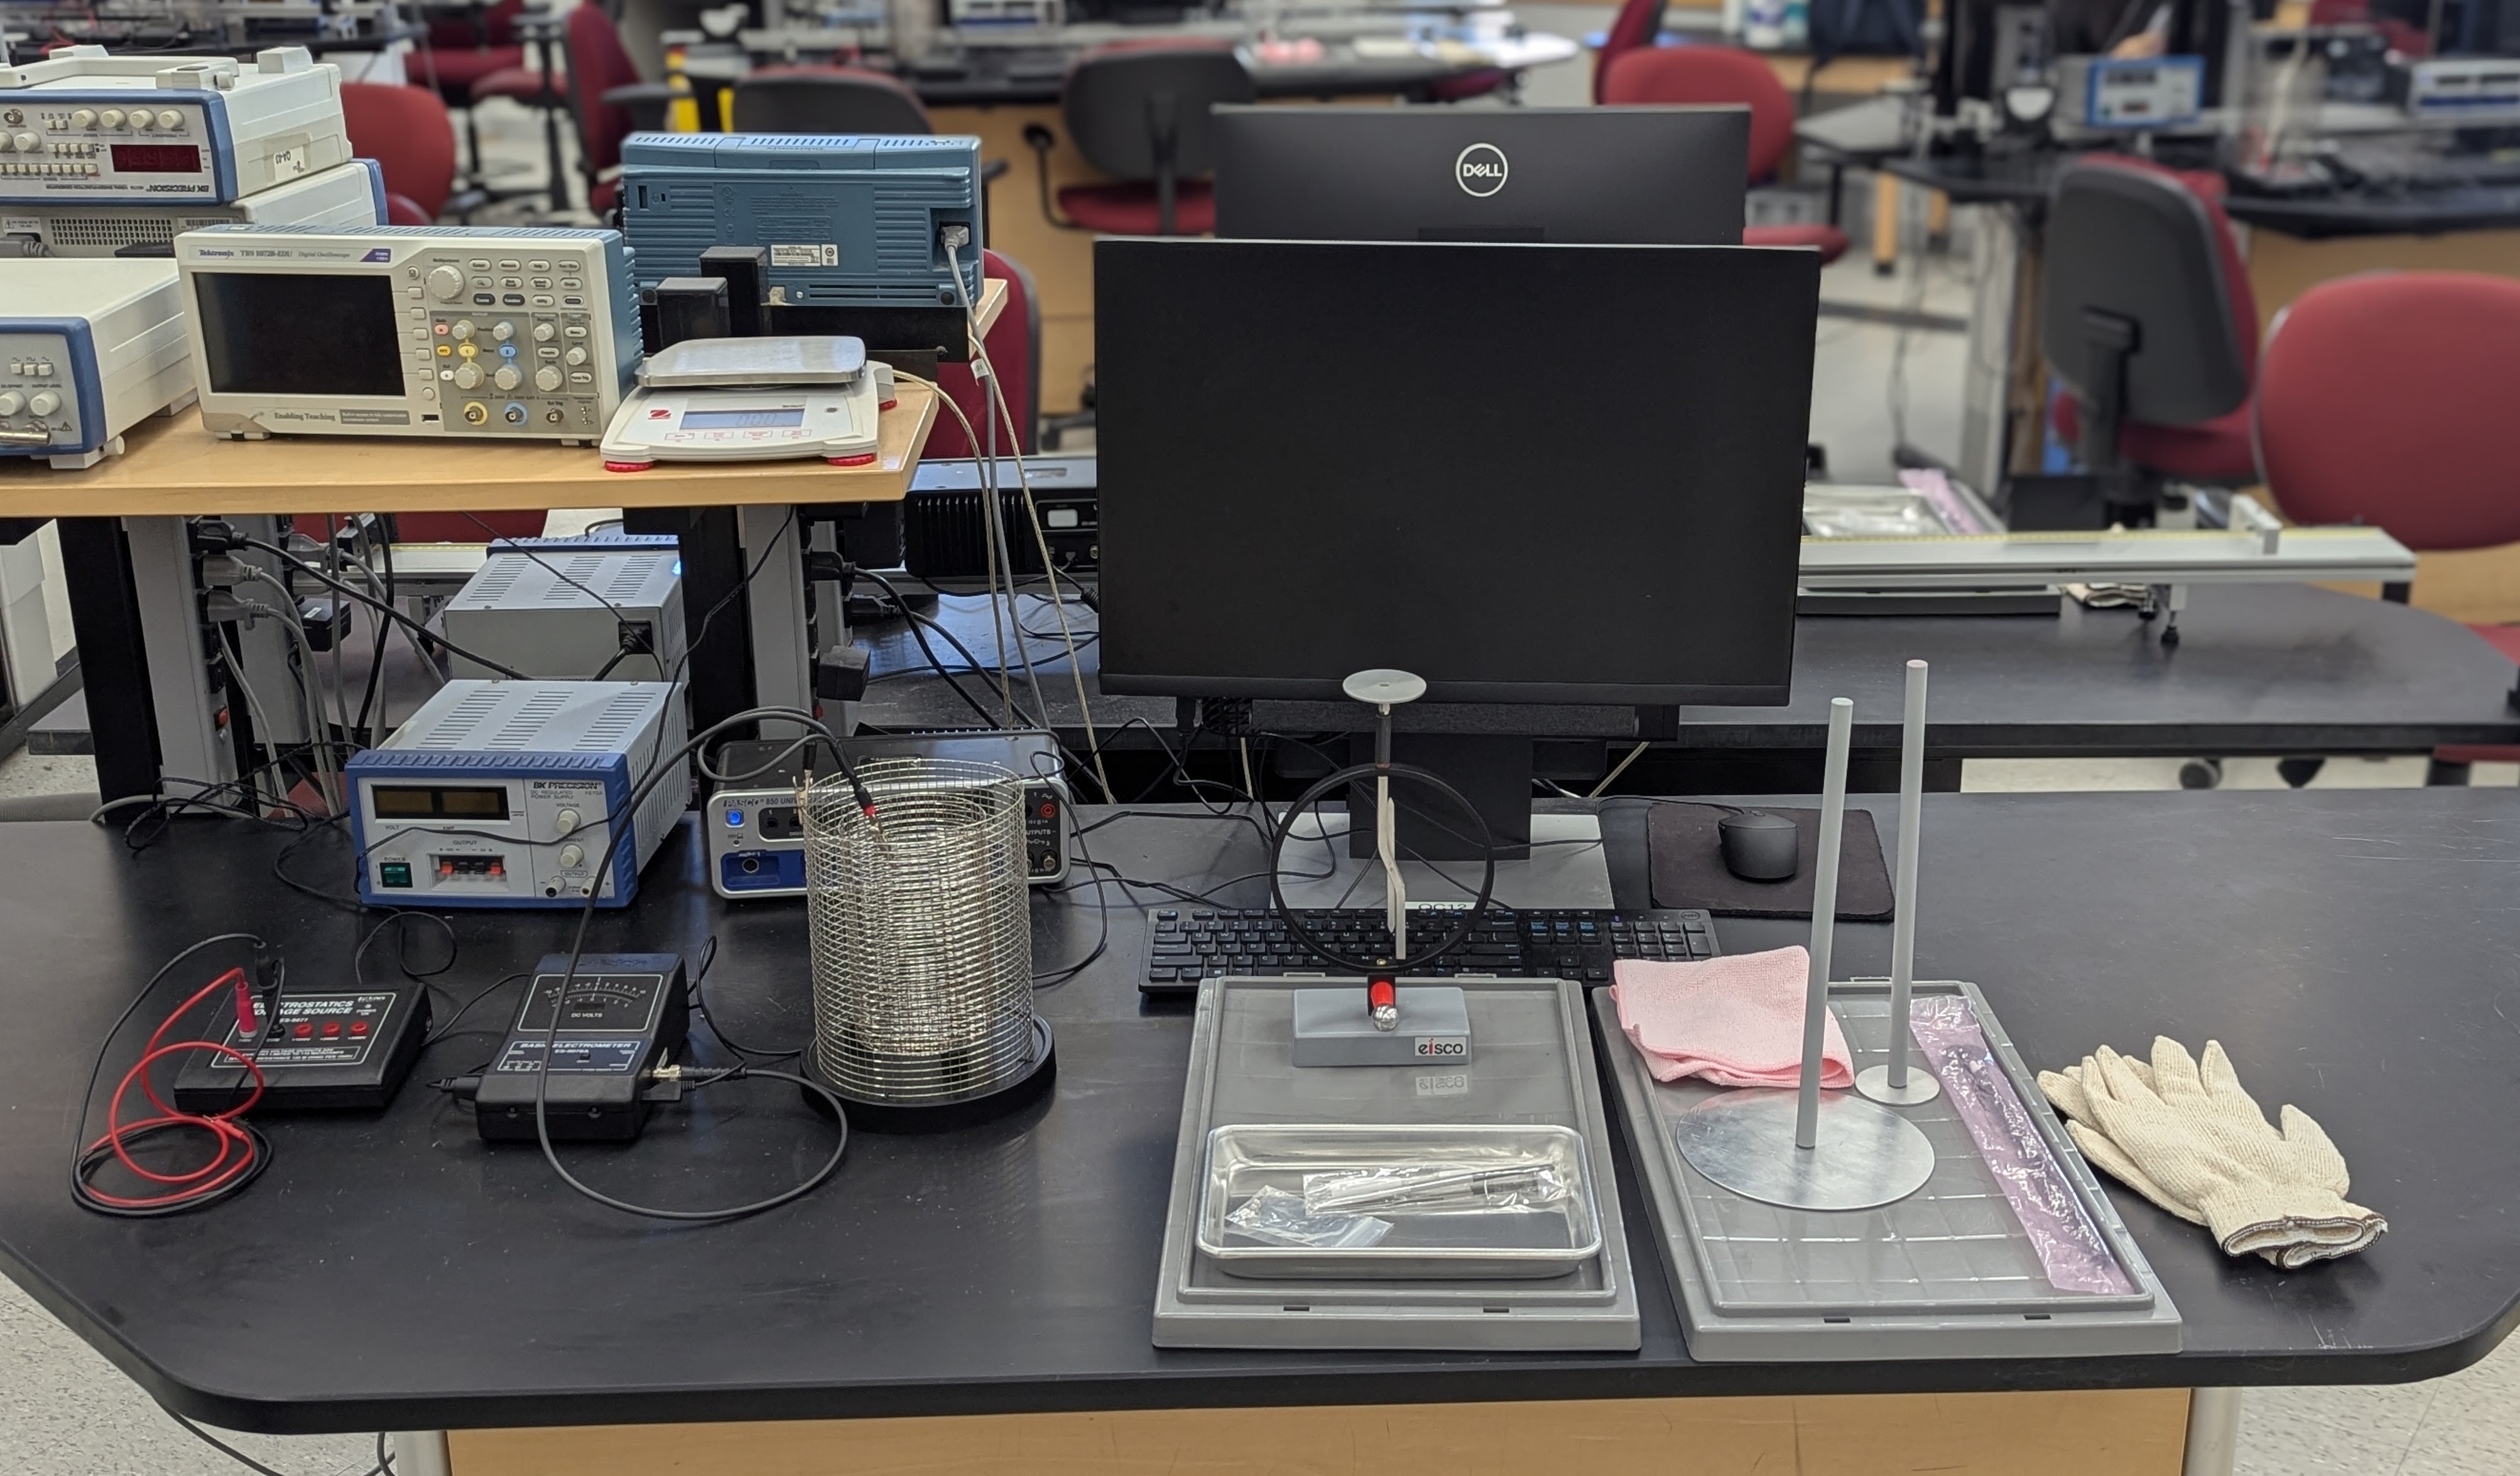
Faraday Ice Pail and Electrometer Set up Instructions Below:
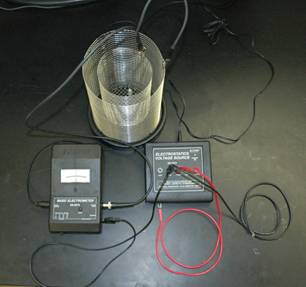
Ice Pail wiring and set up. Note that the black clip goes on the outside and the red clip foes on the inside.
Wires connected to the Electrometer
The Electrometer has 3 wires plugged into it:
- The 8 pin DIN to smaller 8 pin wire is plugged into the singal output socket on the left side.
- The other end of this wire is plugged into Analog A of the interface.
- The BNC to alligator wire is plugged into the Coaxial BNC jack on the right side.
- The other end of this wire is clipped onto the Ice Pail
- The black banana to banana wire is plugged into the ground socket on the right side.
- The other end of this wire is plugged into the com socket of the power source.
The Power Source must be turned on with the switch in the back to work.

The electrometer (analog) with everything plugged in


![[HOME]](../../images/Mis/home2.GIF)
![[PREV]](../../images/Mis/arrow2.GIF)
![[PREV]](../../images/Mis/arrownew.gif)