Equipment List:
- 2x Auto Range Multimeter x2
- Variable AC Power Supply 0-6V
- Field Mapping Tray:
- Water Tray
- Mapping Tray Bottom
- 3 x 3x Field Mapping Feet For levelling, attached to bottom already.
- Binding Post Black Already attached.
- Binding Post RedAlready attached.
- 2 x Brass Rectangular Electrode
- Brass Ring Electrode
- 2 x Metal Rod - L Shaped
- Styrofoam Cup - Large
- 3 x Banana Plug Cord - Black
- 2 x Banana Cord - Red
- Multimeter Lead - Red
General Class use :
- Paper towel to clean up water spills.
- Wet/dry shop vacuum for cleaning up the water at the end of each day.
Notes and tests:
- Last TA of the day should vacuum out each of the trays and set them where they can dry.
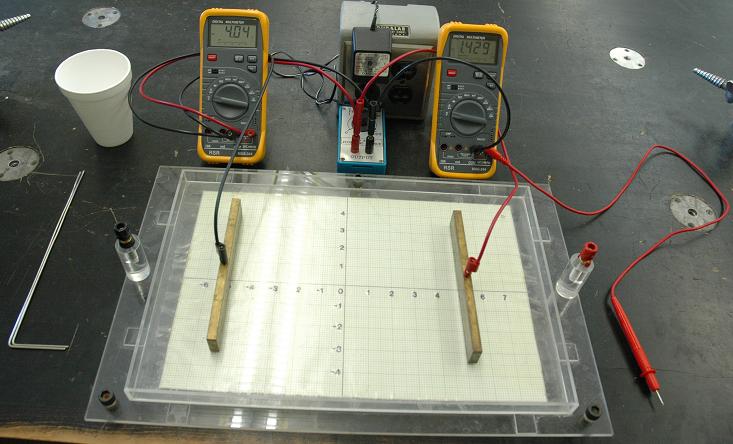
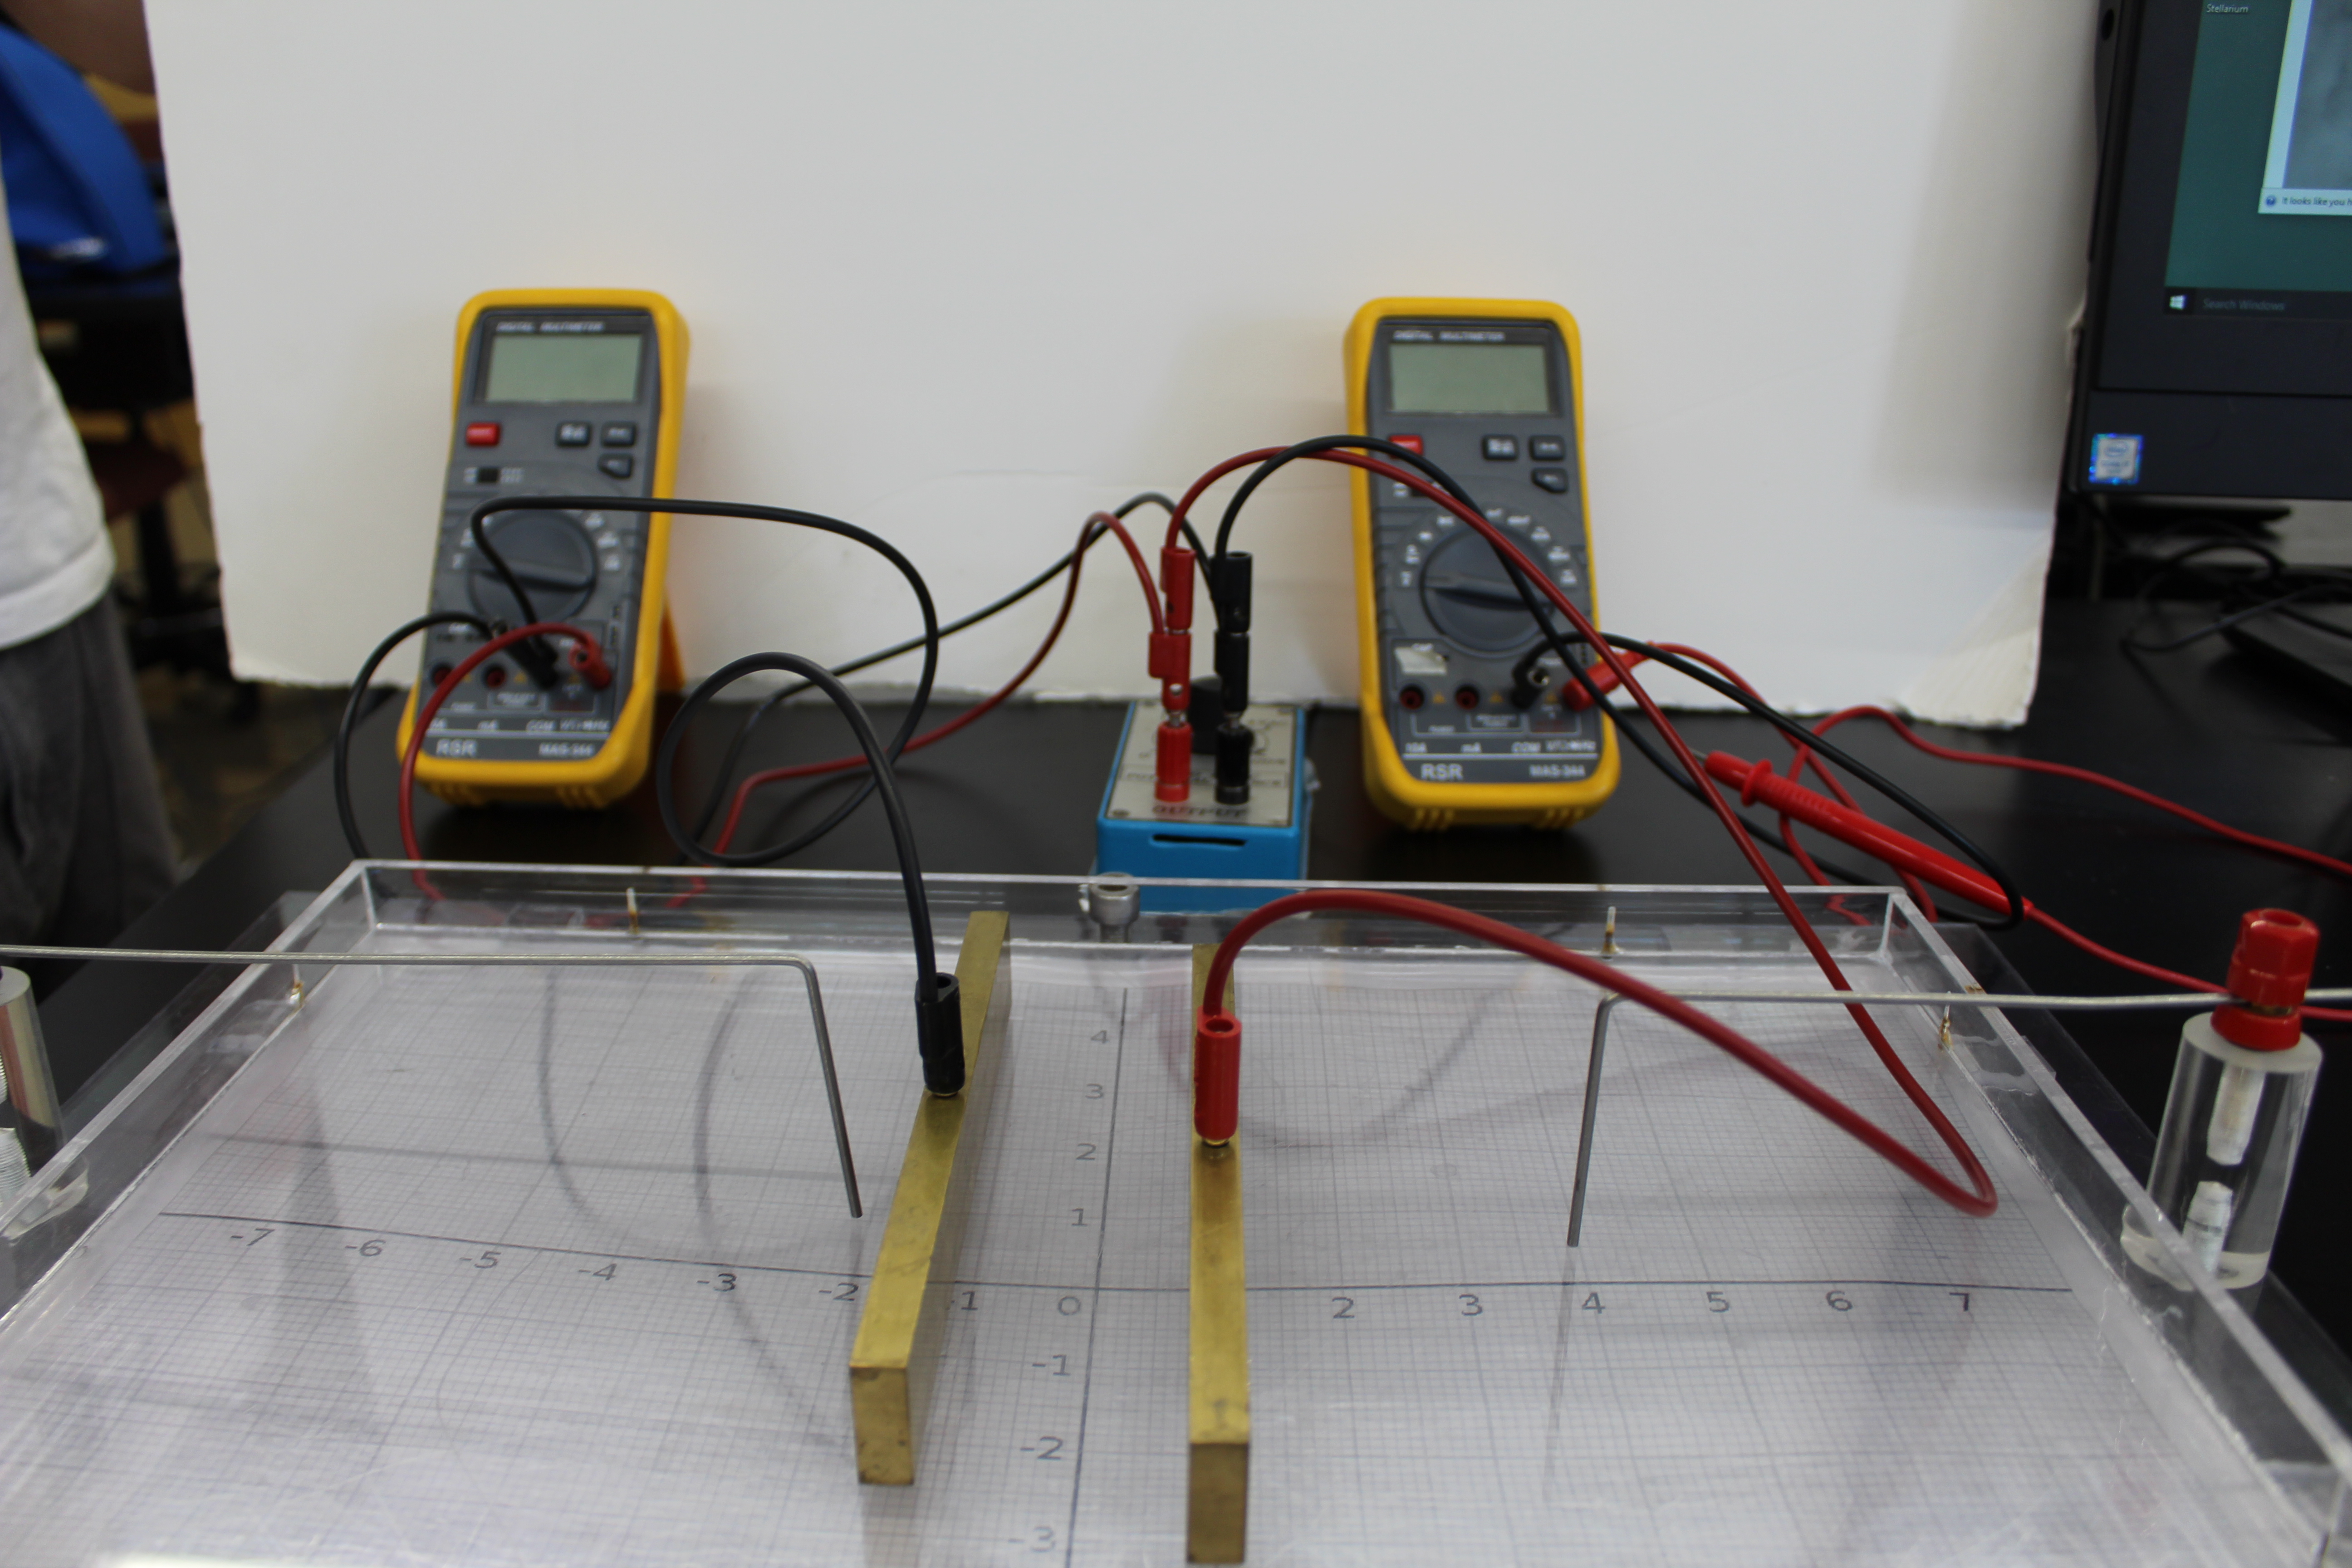
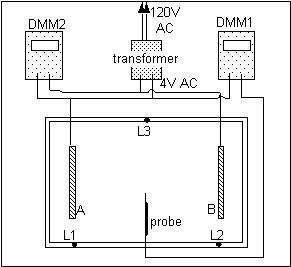
- Test by turning on the power supply and the two DMMs. Make sure the multimeter dial is set to volts and the button is pushed to switch to AC from DC. Adjust the power supply so DMM2 reads 4 V. Touch electrode A with the voltage probe attached to DMM1, it should read 0 V, then touch the probe to electrode B, it should read 4 V.
- The most likely problem with this set up is improper wire connections. The next is a failed power supply.
- Level the trays with a bubble level.
- Black cables: DMM2->AC->DMM1, A->DMM2
- Red cables: DMM2->AC->B
- Red probe: DMM1


![[HOME]](../../images/Mis/home2.GIF)
![[PREV]](../../images/Mis/arrow2.GIF)
![[PREV]](../../images/Mis/arrownew.gif)